Hosting the OSRM API on Amazon EC2: Running osrm-backend as a web service
How to run the OSRM API as a web service on Amazon EC2.

In my last post, I explained how you can run OSRM (Open Source Routing Machine) locally on your laptop or desktop. In this one, I'll show you how to host the OSRM API as a web service on Amazon EC2, so that you can call OSRM from anywhere with an internet connection.

Part 1: Introduction to OSRM: Setting up osrm-backend using Docker
Part 2: Hosting the OSRM API on EC2: Running osrm-backend as a web service (this article)
Part 3: OSRM Route API: Free turn by turn directions and polylines
Part 4: OSRM Table API: Free distance matrix API
When we talk about running OSRM, we usually mean running osrm-backend, its high performance routing engine. While you could get away with running it locally, this is not ideal for two reasons.
First, OSRM consumes a lot of memory (specifically, random access memory otherwise known as RAM). It needs RAM to run the partition and contraction algorithms required to consume OSM map data and it needs RAM to run Djikstra's algorithm to find the shortest route between two points. As a rule of thumb, the RAM needed to run OSRM is about 5x the file size of the map you are using. So for a map of the USA (us-latest.osm.pbf) that is 9.3 GB in size, you'll need about 50 GB of memory. This is more than what a top of the line 2023 MacBook Pro has. Although you could simply buy a more powerful computer, a better solution would be to host OSRM on the cloud where you can easily scale your memory and performance requirements up or down as needed. In this tutorial I'll be using Amazon EC2 but you could just as easily use Google Cloud Platform, Microsoft Azure or any reputable cloud service.
Second, most of OSRM's value derives from being able to use it with web based logistics and fleet management applications. For example, our routing engine relies on the Table Service API to generate distance and travel time matrices for route optimization calculations while our last mile delivery platforms Parcelizer and RouteBasic use the Route Service API to generate polylines that show driver routes on a map. Hosting OSRM as a web service allows you to securely expose the its APIs so that it can be used by any software connected to the internet.
Setting up EC2 for the OSRM API
Amazon Elastic Compute Cloud (Amazon EC2) is a web service provided by Amazon Web Services (AWS) that allows you to rent virtual servers, known as "instances," in the cloud. There are basically three things you need to do to make it work with OSRM.
- Provision an AWS EC2 instance
- Install Docker
- Install osrm-backend
But before we can do any of these things, we need to first create an AWS account and sign into the AWS Management Console.
Provisioning an AWS EC2 instance
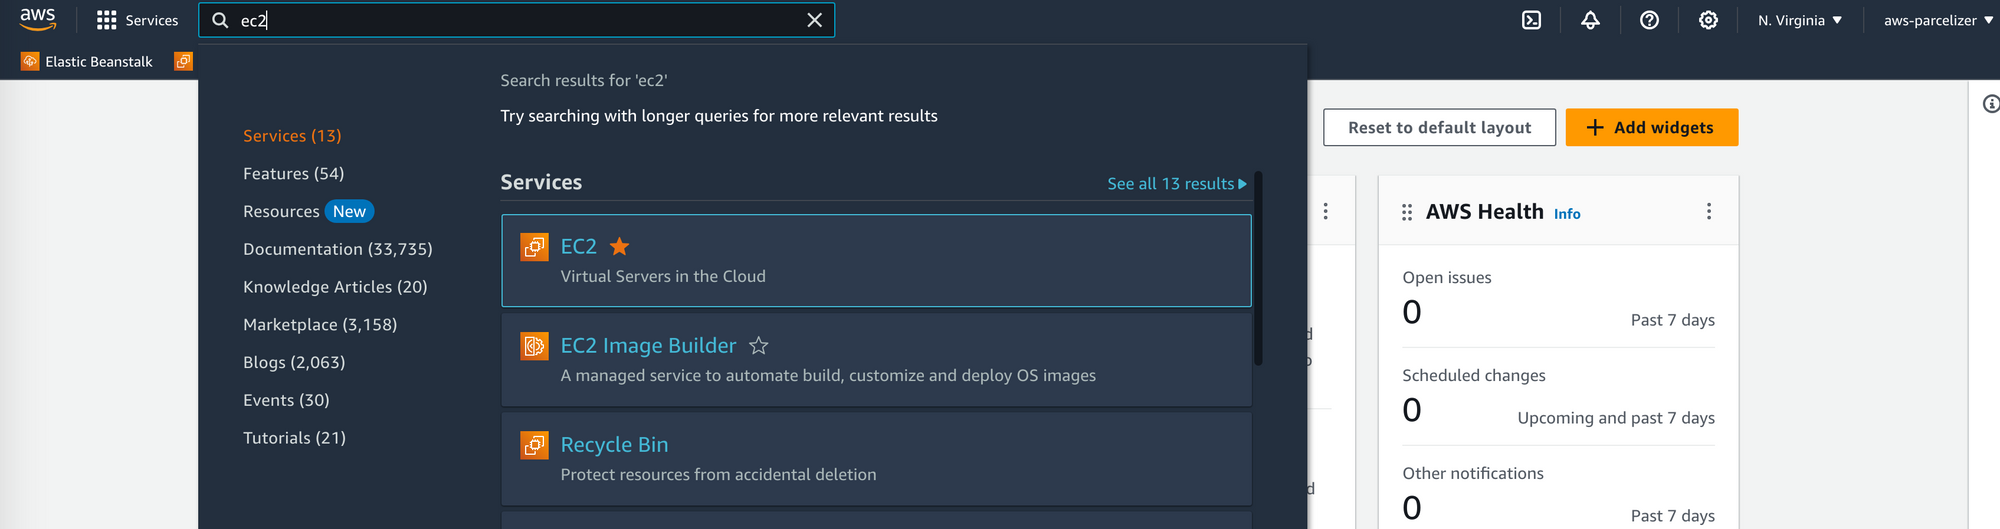
Once you are signed up and logged into AWS, search for "ec2" on the search bar at the top of the main AWS Console dashboard. EC2 should be the first option that comes up.
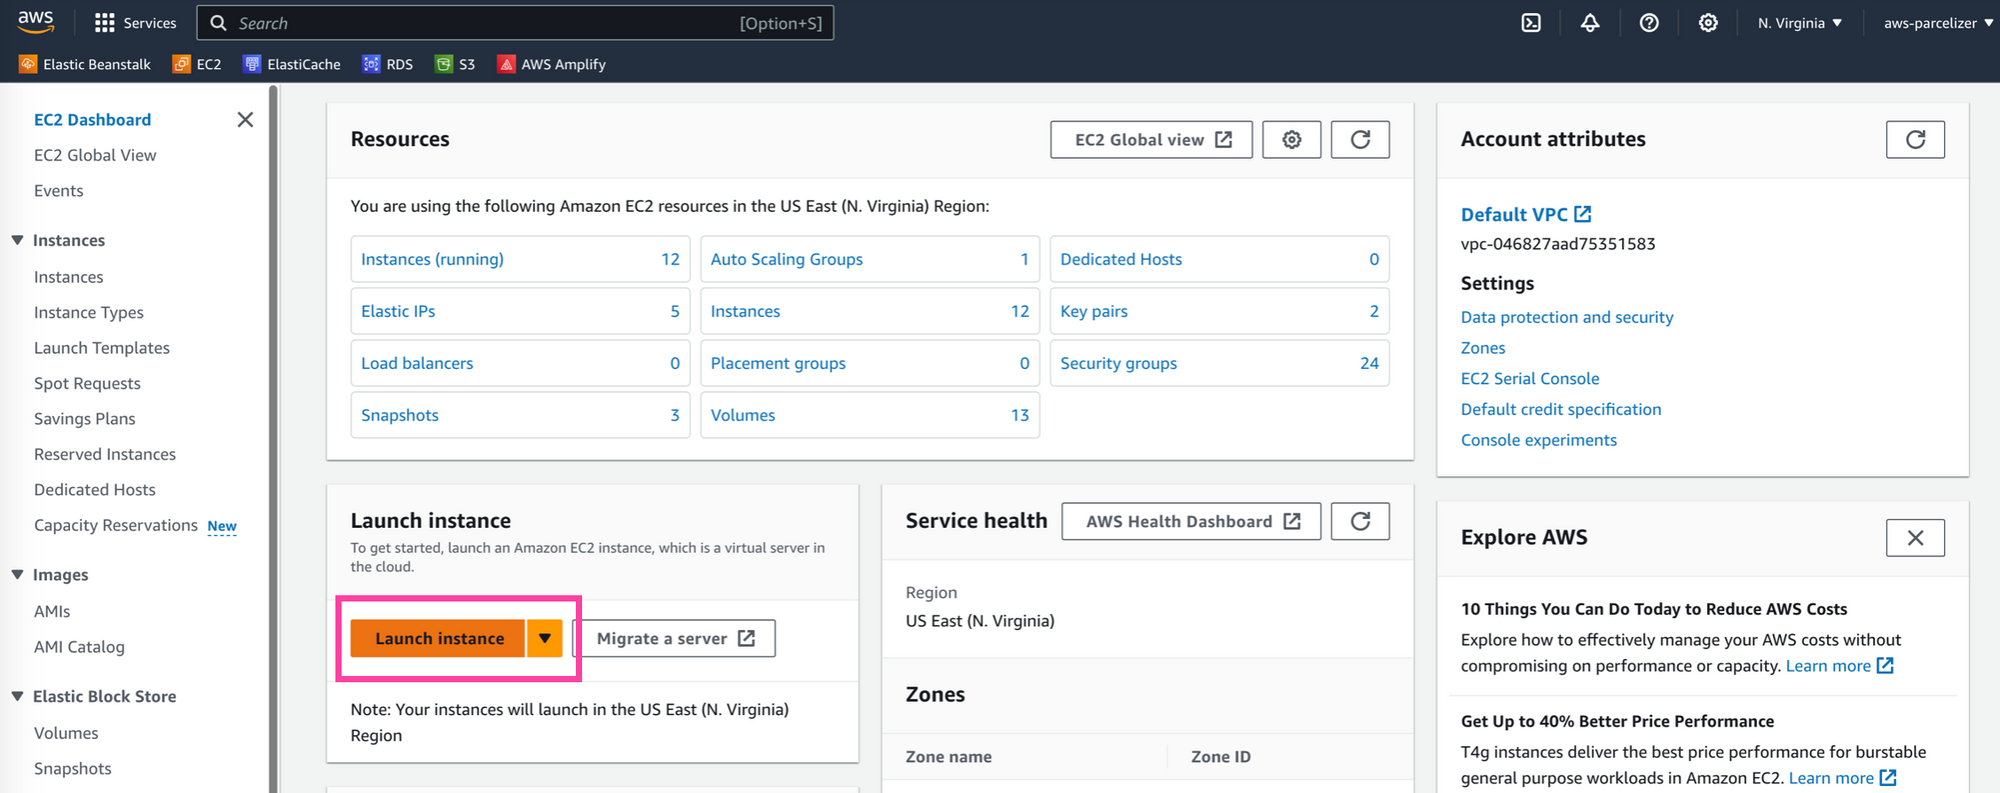
Click the [Launch Instance] button.
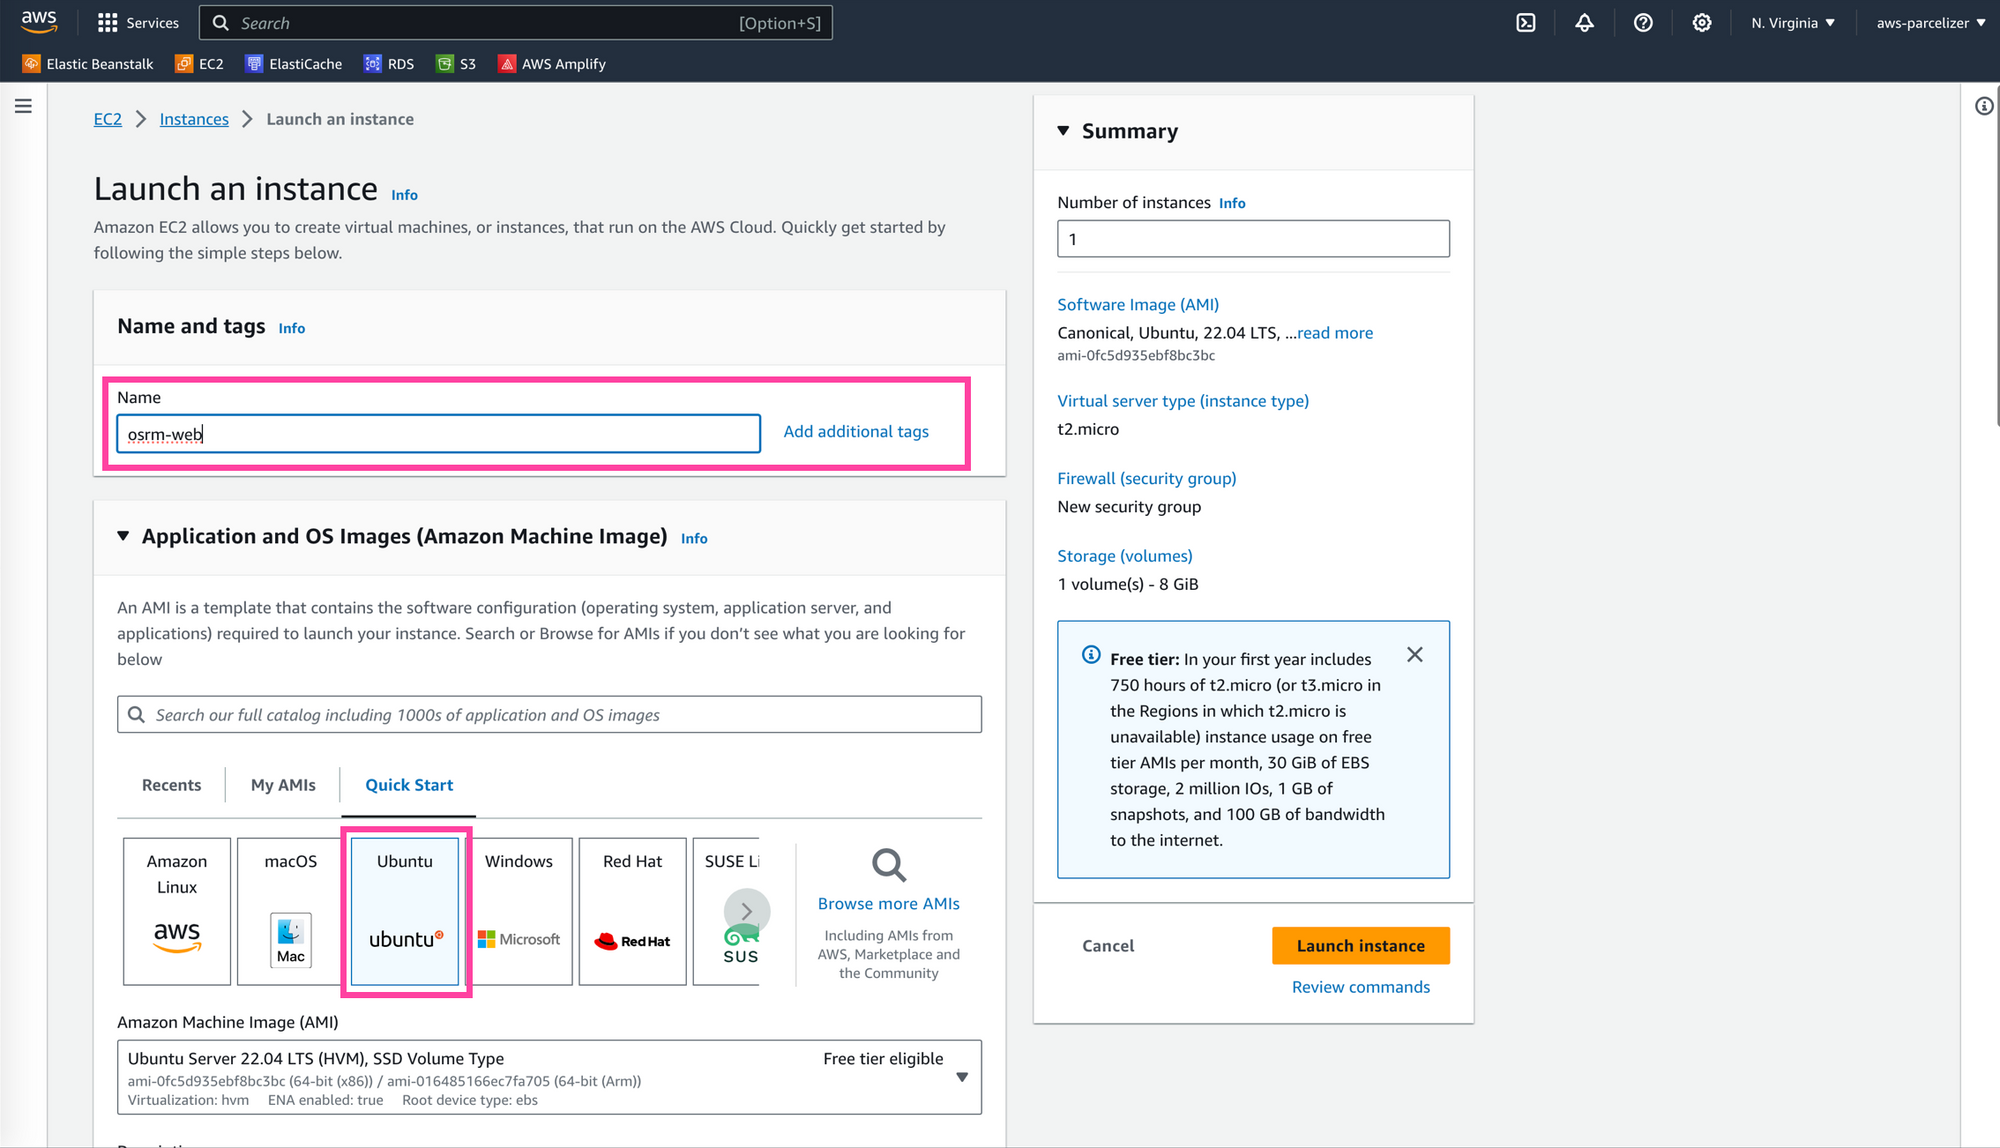
On the next page, enter "osrm-web" in the Name field under Name and Tags. This is the name of your EC2 instance. You can call it anything you want but it's helpful to use something descriptive.
Choose "Ubuntu" in the Application and OS Images section. Ubuntu is a popular and widely used operating system (OS) based on the Linux kernel. It's my OS of choice when working with open source projects like OSRM.
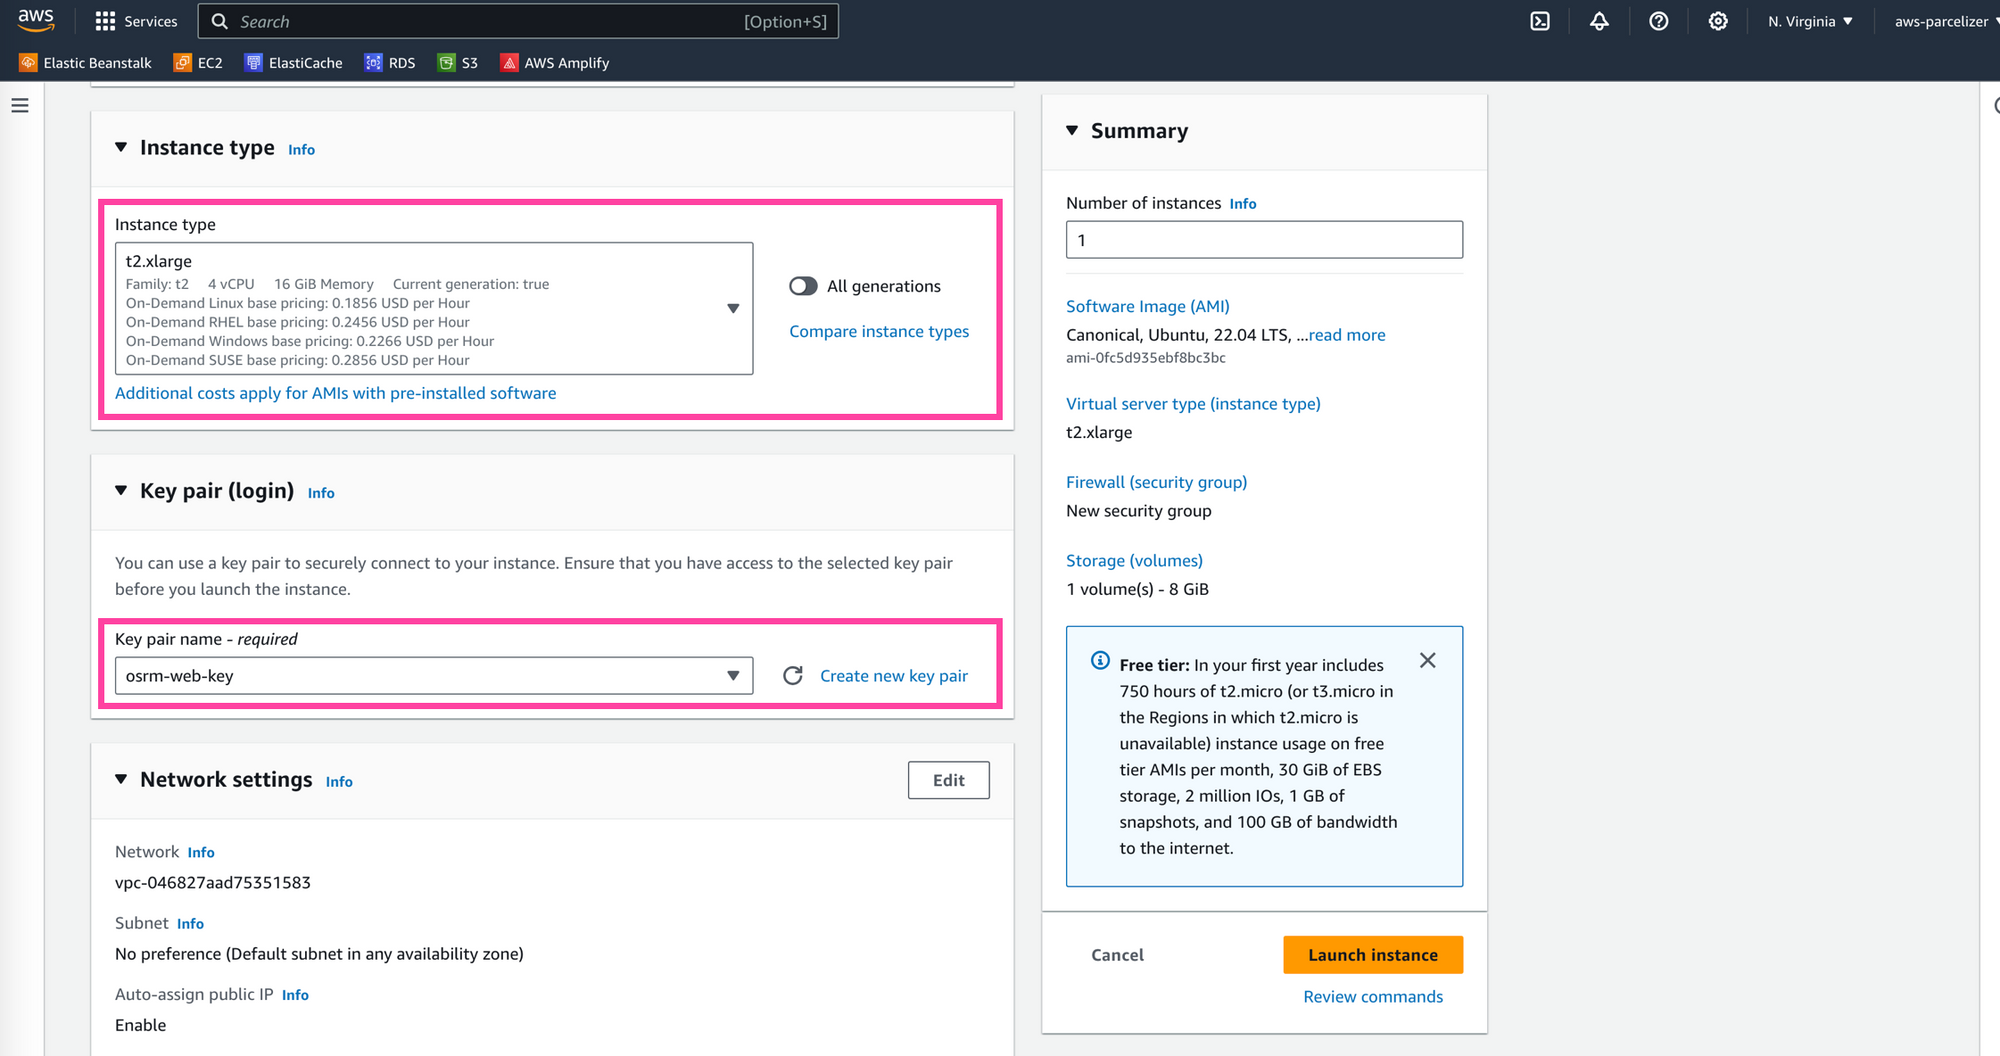
Under Instance Type choose "t2.xlarge". T2 instances are designed for workloads with varying or burstable CPU requirements and the xlarge sizing comes with 16 GB of RAM, more than enough for the map layer we'll be using in this tutorial. T2 instances are provisioned with a baseline level of CPU performance that you can use continuously. However, when your workload requires more CPU power, you can burst above the baseline for a limited period. This perfectly describes the OSRM use case - most of the time, you'll use zero or very little compute but when your routing system needs OSRM to plan routes for hundreds of vehicles at the start of each work day, you'll use a lot of computation power in a short amount of time.
Next, click the Create New Key Pair link under Key Pair (Login). This is how you'll authenticate with AWS and SSH ("Secure Shell") into your EC2 instance.
A new pop up window will open. Fill in your Key Pair Name (again, you can name it anything you want but something descriptive like "osrm-web-key" will help you find it later) and choose "RSA" for Key Pair Type and ".pem" for Private Key File Format.
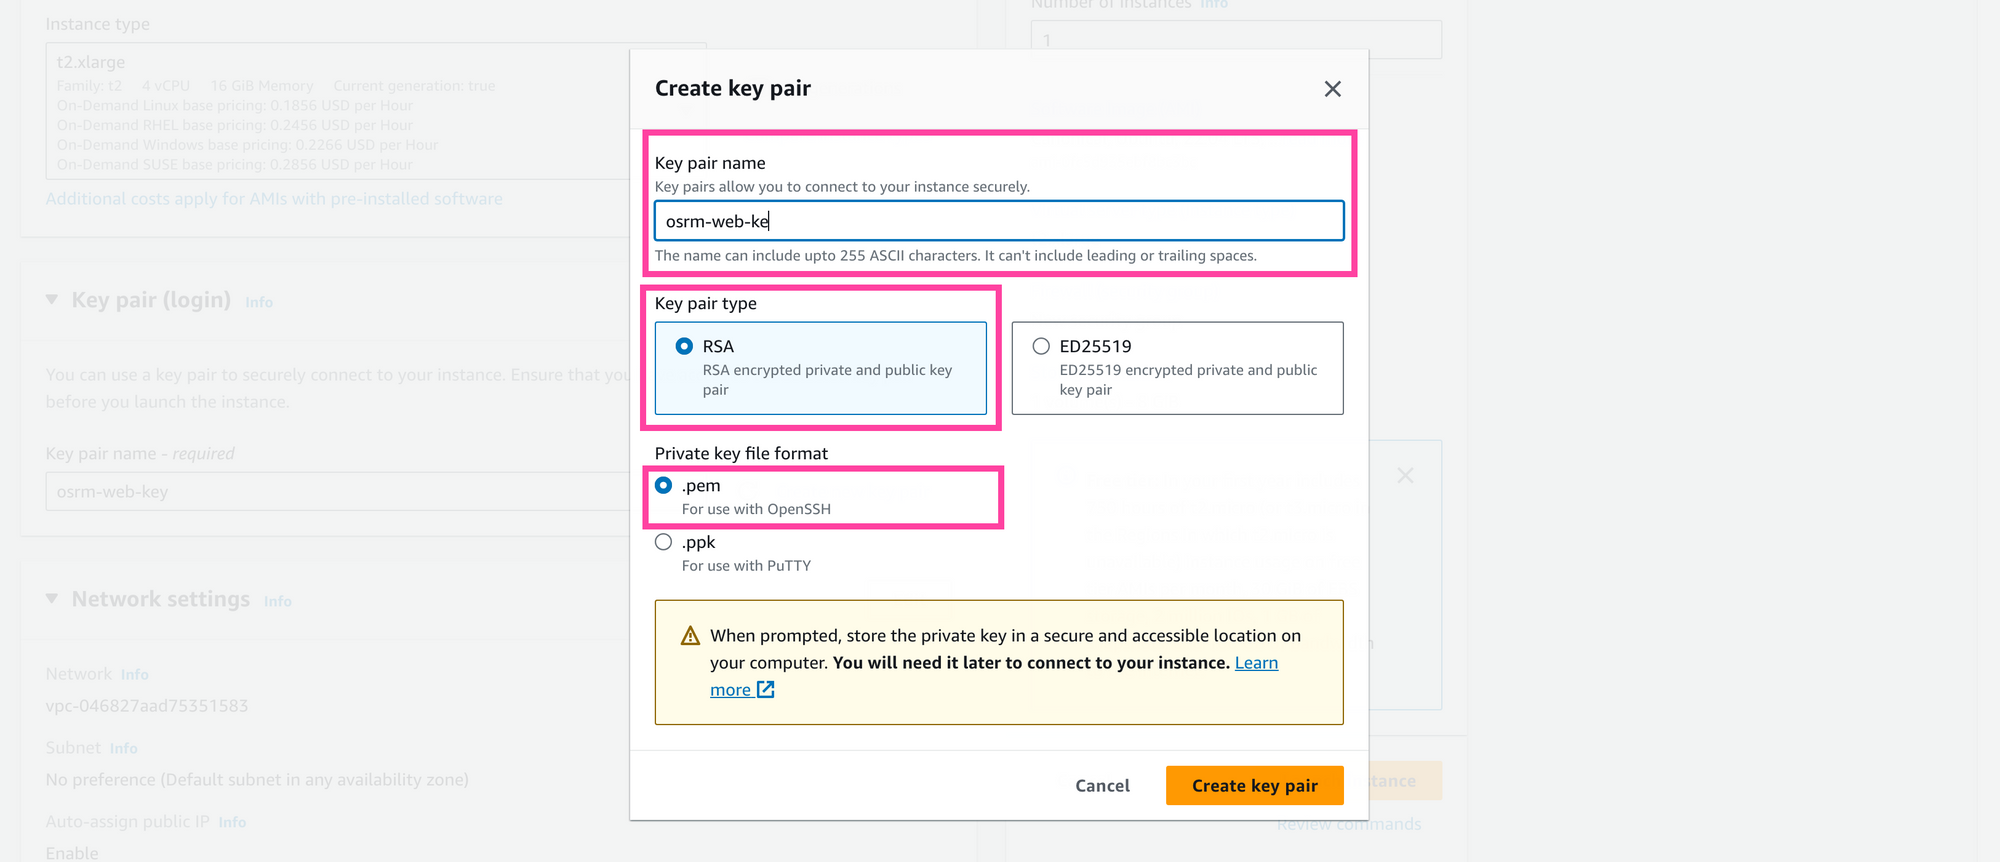
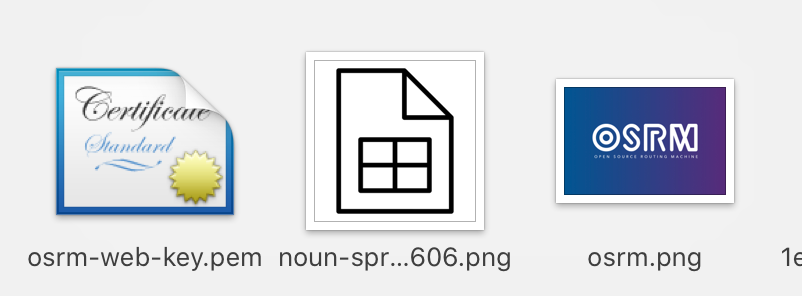
Click the [Create Key Pair] button and download the resulting .pem file to your computer. Hang onto it, you'll need to use it later to log into the server. For this example, I've saved it to the /Downloads folder on my Mac.
Our next to last step is to authorize traffic being sent to OSRM. In Network Settings, tick these checkboxes:
✅ Allow SSH Traffic from Anywhere 0.0.0.0/0
✅ Allow HTTP Traffic from the Internet.
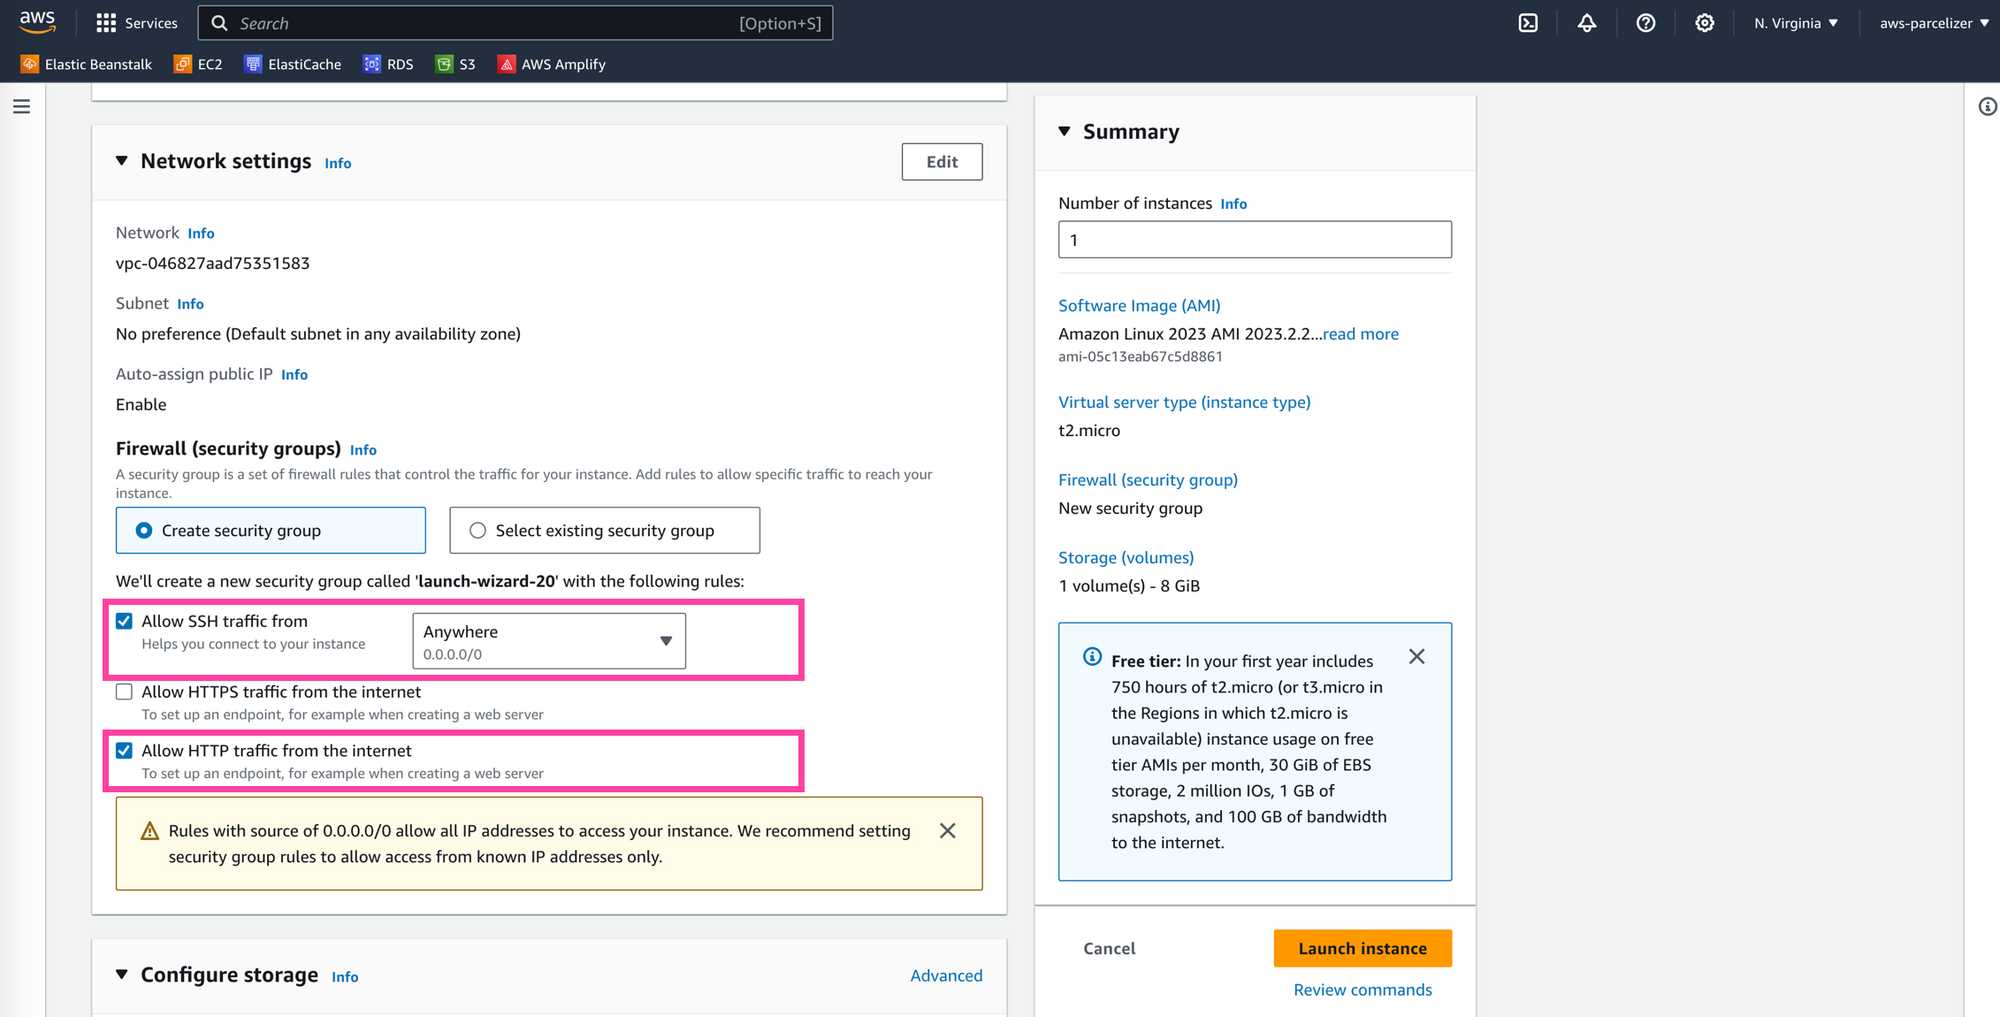
We must also explicitly allow traffic on port 5000, OSRM's default port. To do this, click the [Edit] Network Settings button on the top right and add a new security group rule. Under Type, chose "Custom TCP" and for Port Range enter "5000".

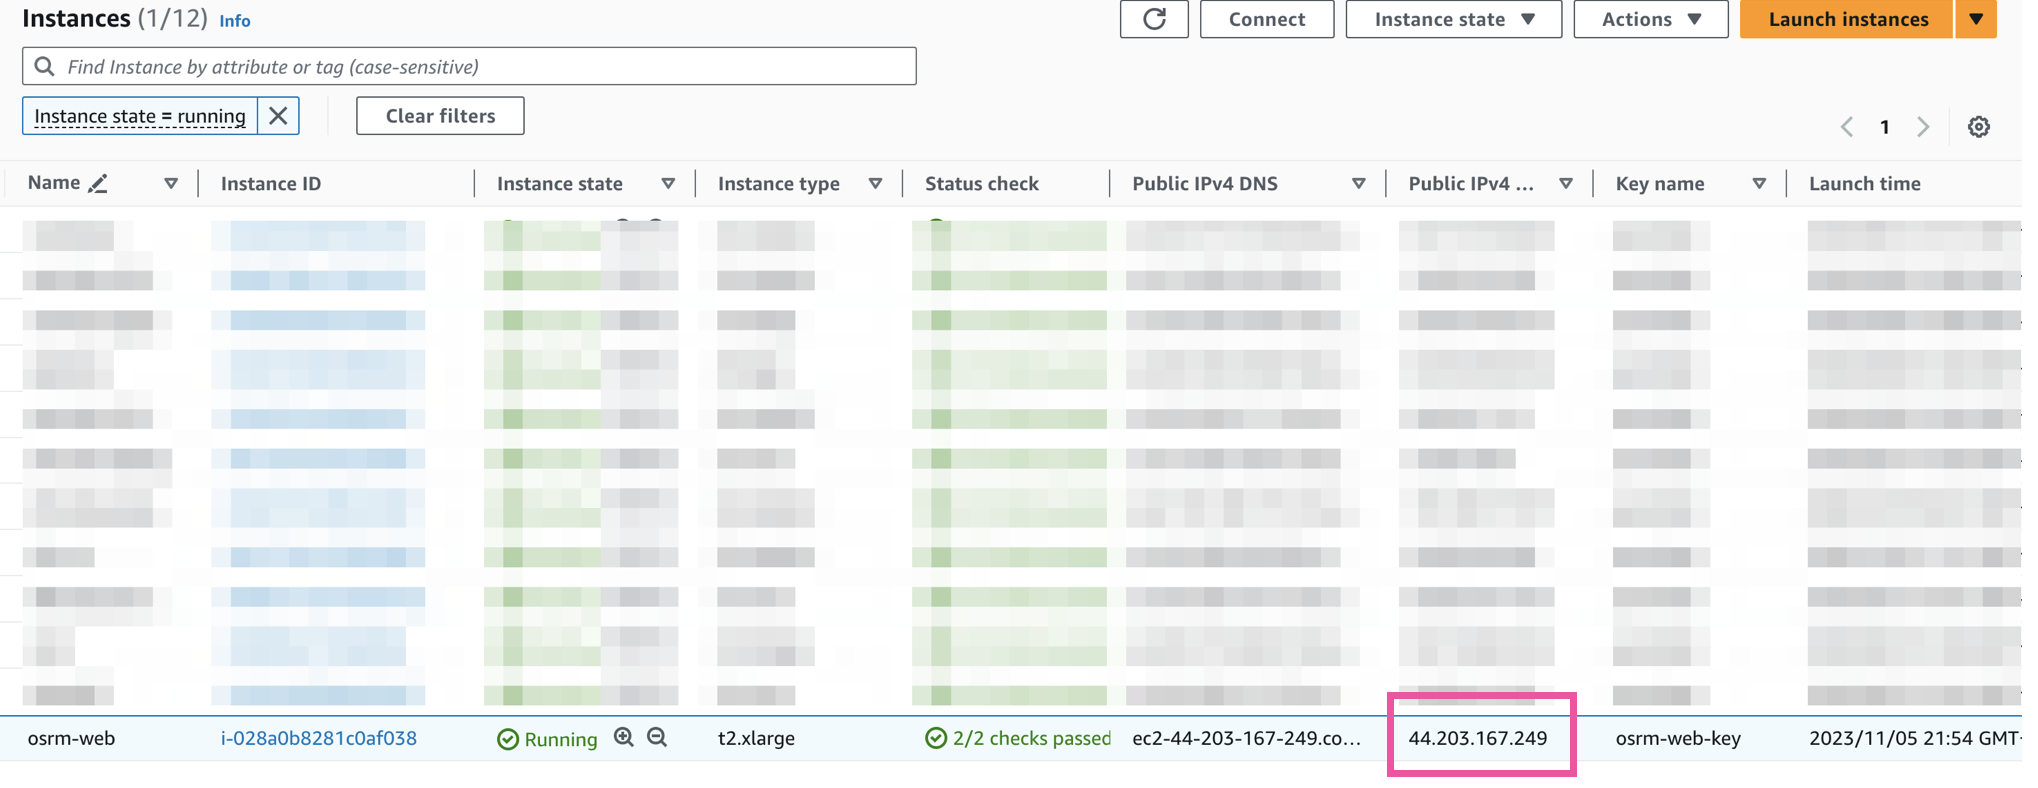
Finally, click the [Launch Instance] button and we are done! Wait a few minutes for the EC2 instance to spin up and take note of its IP address under the Public IPv4 column. We'll need it to SSH into the server.
Installing Docker on Amazon EC2
Before we can install and run OSRM on EC2, we need to install Docker. When we ran OSRM locally on our machine, we downloaded Docker as a desktop app that ran in the background but since we are going to run it on a server, we'll need to install Docker via the command line (the following is taken from the official guide to installing Docker on Ubuntu).
SSH into EC2
Remember the .pem file from earlier? Keep in handy and note the file name and file path on your computer.
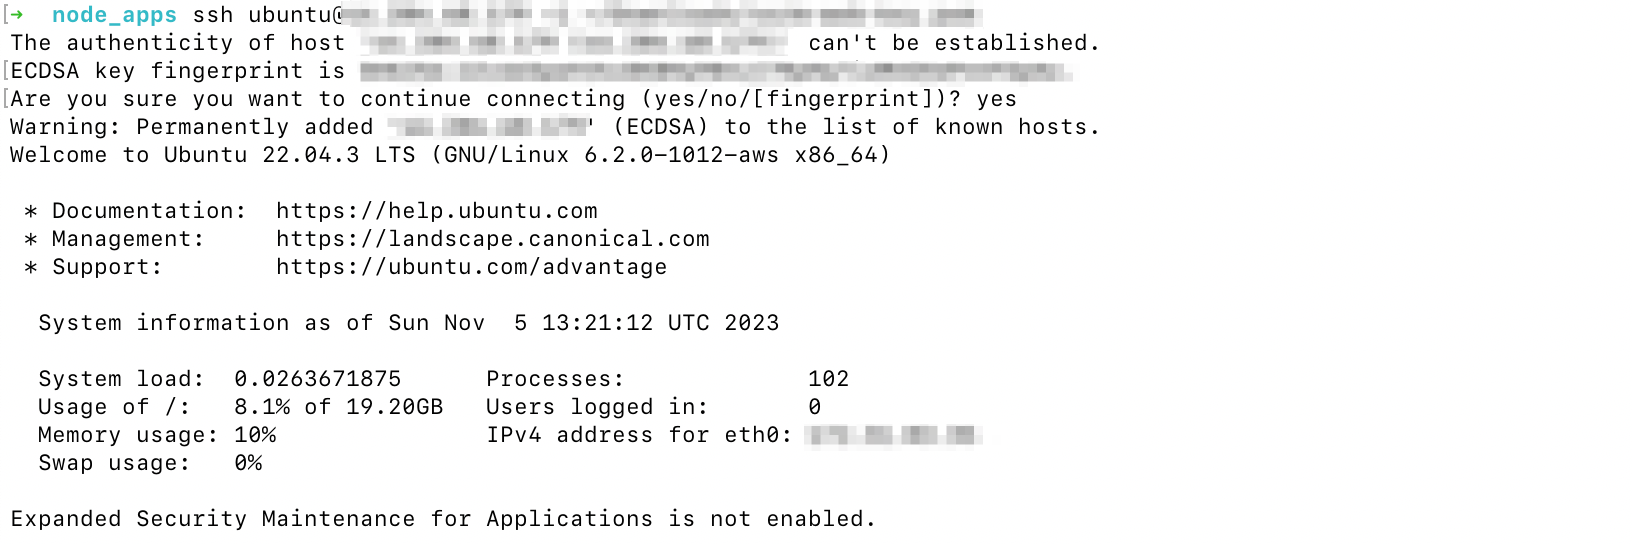
ssh ubuntu@$ec2_ip -i $file_path/$pem_file_name Here, $ec2_ip is the IP address of the EC2 instance we obtained in the previous section and $file_path/$pem_file_name refers to the .pem file generated when we created the EC2 instance. For example, on my computer, my .pem file is called "osrm-web-key.pem" and it is in my /Downloads folder on my Mac, so the full path and file name is "~/Downloads/osrm-web-key.pem".
Once you've logged in, you should see a success message that looks like this:
Uninstall previous versions of Docker
If you are using an existing EC2 instance and have an old copy of Docker already installed, you need to first remove it.
for pkg in docker.io docker-doc docker-compose docker-compose-v2 podman-docker containerd runc; do sudo apt-get remove $pkg; doneInstall using the apt repository
To install Docker Engine on EC2 for the first time, you should begin by setting up the Docker repository with apt (Advanced Package Tooling), a popular command-line package management tool used in Debian-based Linux distributions, including Ubuntu. Once this is done, you'll be able to install and keep Docker up-to-date by using the apt-get command.
# Add Docker's official GPG key:
sudo apt-get update
sudo apt-get install ca-certificates curl gnupg
sudo install -m 0755 -d /etc/apt/keyrings
curl -fsSL https://download.docker.com/linux/ubuntu/gpg | sudo gpg --dearmor -o /etc/apt/keyrings/docker.gpg
sudo chmod a+r /etc/apt/keyrings/docker.gpg

# Add the repository to Apt sources:
echo \
  "deb [arch="$(dpkg --print-architecture)" signed-by=/etc/apt/keyrings/docker.gpg] https://download.docker.com/linux/ubuntu \
  "$(. /etc/os-release && echo "$VERSION_CODENAME")" stable" | \
  sudo tee /etc/apt/sources.list.d/docker.list > /dev/null
sudo apt-get update
With this done, install the latest version of Docker:
sudo apt-get install docker-ce docker-ce-cli containerd.io docker-buildx-plugin docker-compose-pluginTo check that everything is working, run the hello world image:
sudo docker run hello-worldIf everything worked like it should, you'll get a printed confirmation message:

Installing osrm-backend and running the OSRM API
We are finally ready to begin the osrm-backend install. The rest of this tutorial closely follows my last post on setting up osrm-backend using Docker, so I'll make it brief:
Download Open Street Map data
wget http://download.geofabrik.de/north-america/canada/british-columbia-latest.osm.pbf
Spin up the osrm-backend image
docker run -t -v "${PWD}:/data" ghcr.io/project-osrm/osrm-backend osrm-extract -p /opt/car.lua /data/british-columbia-latest.osm.pbf || echo "osrm-extract failed"
Partition the graph
docker run -t -v "${PWD}:/data" ghcr.io/project-osrm/osrm-backend osrm-partition /data/british-columbia-latest.osrm || echo "osrm-partition failed"Contract the graph
docker run -t -v "${PWD}:/data" ghcr.io/project-osrm/osrm-backend osrm-customize /data/british-columbia-latest.osrm || echo "osrm-customize failed"Run osrm-backend to fire up the OSRM API
docker run -t -i -p 5000:5000 -v "${PWD}:/data" ghcr.io/project-osrm/osrm-backend osrm-routed --algorithm mld /data/british-columbia-latest.osrmYou should get a confirmation message verifying that the OSRM API is running and waiting for requests:

Testing the OSRM API
Using the IP address $ec2_ip of the OSRM server from earlier, make a simple request in your browser to see if it goes through:
http://$ec2_ip:5000/route/v1/driving/-123.1814231,49.195113;-123.4309008,49.0159777?steps=falseIf this worked, you'll see the response as JSON text in your browser:

What's next?
Congratulations! You've successfully run OSRM as a web service that any internet connected application can use. In the next section, we'll do a deep dive on the OSRM Route API, which returns the fastest path between two or more coordinates.
👋 As always, if you have any questions or suggestions for me, please reach out or say hello on LinkedIn.
Next: Part 3: OSRM Route API: Free directions API with turn by turn directions and polylines