Introduction to OSRM: Setting up osrm-backend using Docker
What is OSRM (Open Source Routing Machine) and how to set up osrm-backend using Docker.

OSRM (Open Source Routing Machine) is a high performance routing engine designed for transportation and logistics applications. It's billed as a free alternative to the Google Maps API, and is mostly used to calculate distances and routes between two points. For example, if you run a taxi company and need to bill a customer for a trip from A to B, you could use OSRM to find out the total distance travelled and simply multiply that number by a fixed per kilometer fee e.g. if the driving distance is 10.6 kilometers and your per km rate is $2.00, the cost of the trip is then 10.6 x $2.00 = $21.20.
OSRM is designed to work out of the box with Open Street Map (OSM), a free and open geographic database updated and maintained by a community of volunteers. In this way, you can get most of the functionality of Google Maps (minus real time traffic) without paying any API usage fees. The software engineering effort needed to do this however, is not trivial. So in this series, I will share my experience developing OSRM for use in real-world software applications and provide step by step examples so you can do so too.
Part 1: Introduction to OSRM: Setting up osrm-backend using Docker (this article)
Part 2: Hosting the OSRM API on EC2: Running osrm-backend as a web service
Part 3: OSRM Route API: Free turn by turn directions and polylines
Part 4: OSRM Table API: Free distance matrix API
Getting started with OSRM
The quickest way to get started with OSRM is to run the main routing engine (osrm-backend) on your local machine and start making API calls to it to see what comes back. In this example, we'll ask OSRM to generate a route starting from Vancouver Airport (49.195113, -123.1814231) to 1074 Jefferson Ave, West Vancouver (49.2877865,-123.0672749). Let's get started!
Download Open Street Map data
Run Terminal, create a new folder and call it /osrm-backend-vancouver. cd into the folder.
Download the OpenStreetMap extract for British Columbia, Canada (where Vancouver is located) by either running:
wget http://download.geofabrik.de/north-america/canada/british-columbia-latest.osm.pbf(you can install the wget application by following these instructions) or downloading the data file directly from the GeoFabrik website.

Install Docker and spin up the osrm-backend image
To run OSRM, we are going to use Docker, a program that packages software into standardized units called containers that have everything the software needs to run including libraries, system tools, code, and runtime.
Download Docker Desktop and start it so that it runs in the background.
In the same /osrm-backend-vancouver folder, run:
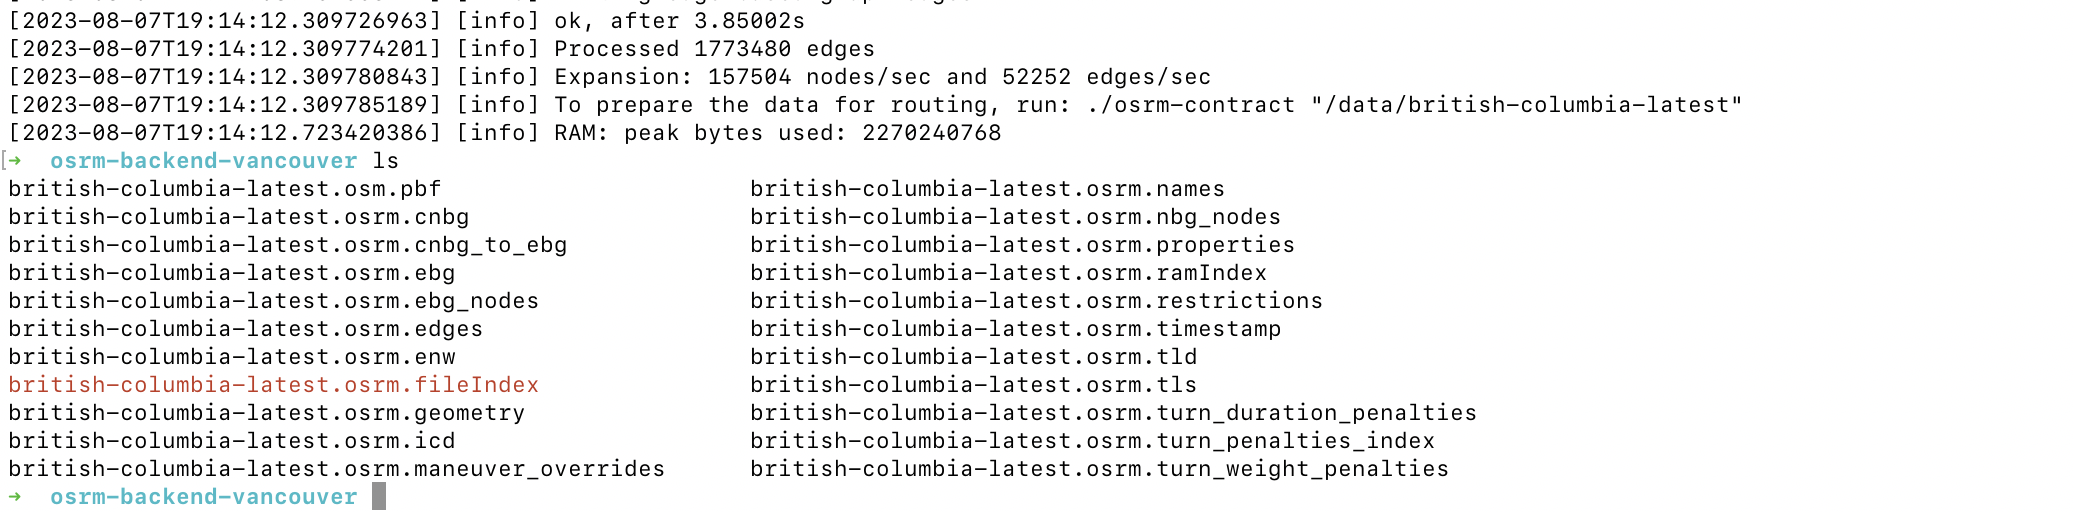
docker run -t -v "${PWD}:/data" ghcr.io/project-osrm/osrm-backend osrm-extract -p /opt/car.lua /data/british-columbia-latest.osm.pbf || echo "osrm-extract failed"If it worked, you'll get a success message and see a bunch of new files in the directory. These files contain the processed map data that OSRM uses to quickly generate routes and driving directions.
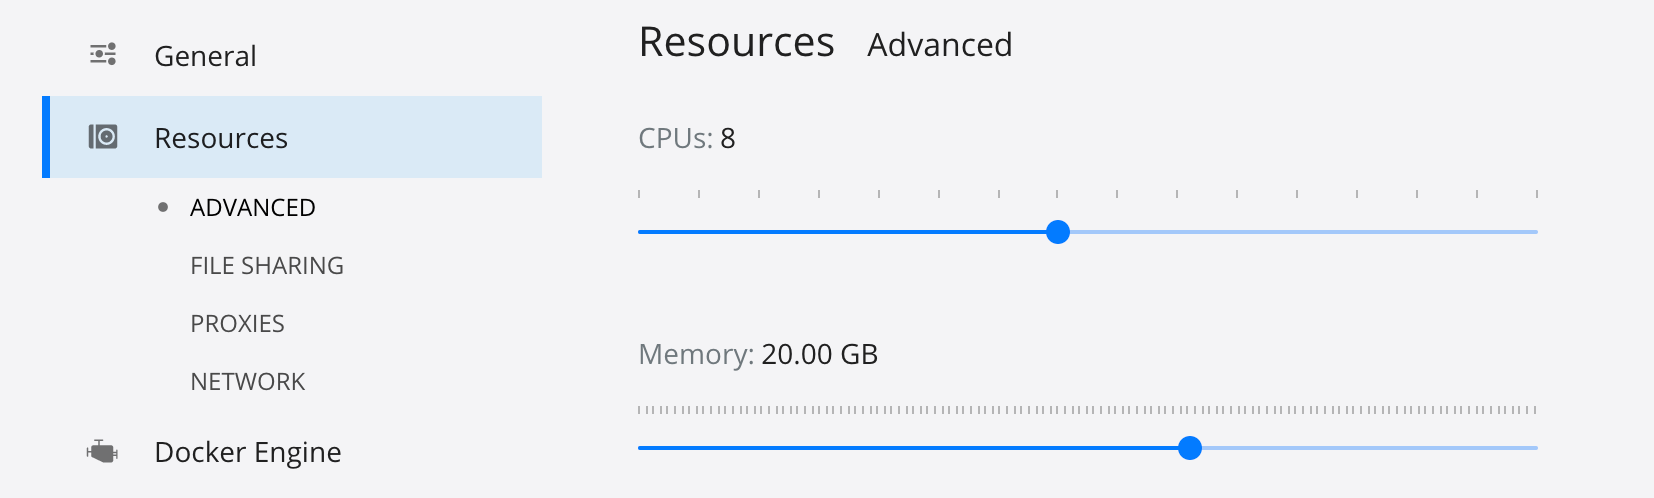
If you get the message osrm-extract-failed, try increasing the amount of memory Docker uses (this used 2.27 GB on my laptop) by going to Preferences > Resources > Memory and moving the slider to the right.
Partition the graph
Next, we are going to run osrm-partition on the map to divide the road network into smaller subsets, often referred to as "cells" or "tiles." This partitioning helps improve the efficiency of the route calculation process.
docker run -t -v "${PWD}:/data" ghcr.io/project-osrm/osrm-backend osrm-partition /data/british-columbia-latest.osrm || echo "osrm-partition failed"At a high level, here's what a partitioning algorithm does:
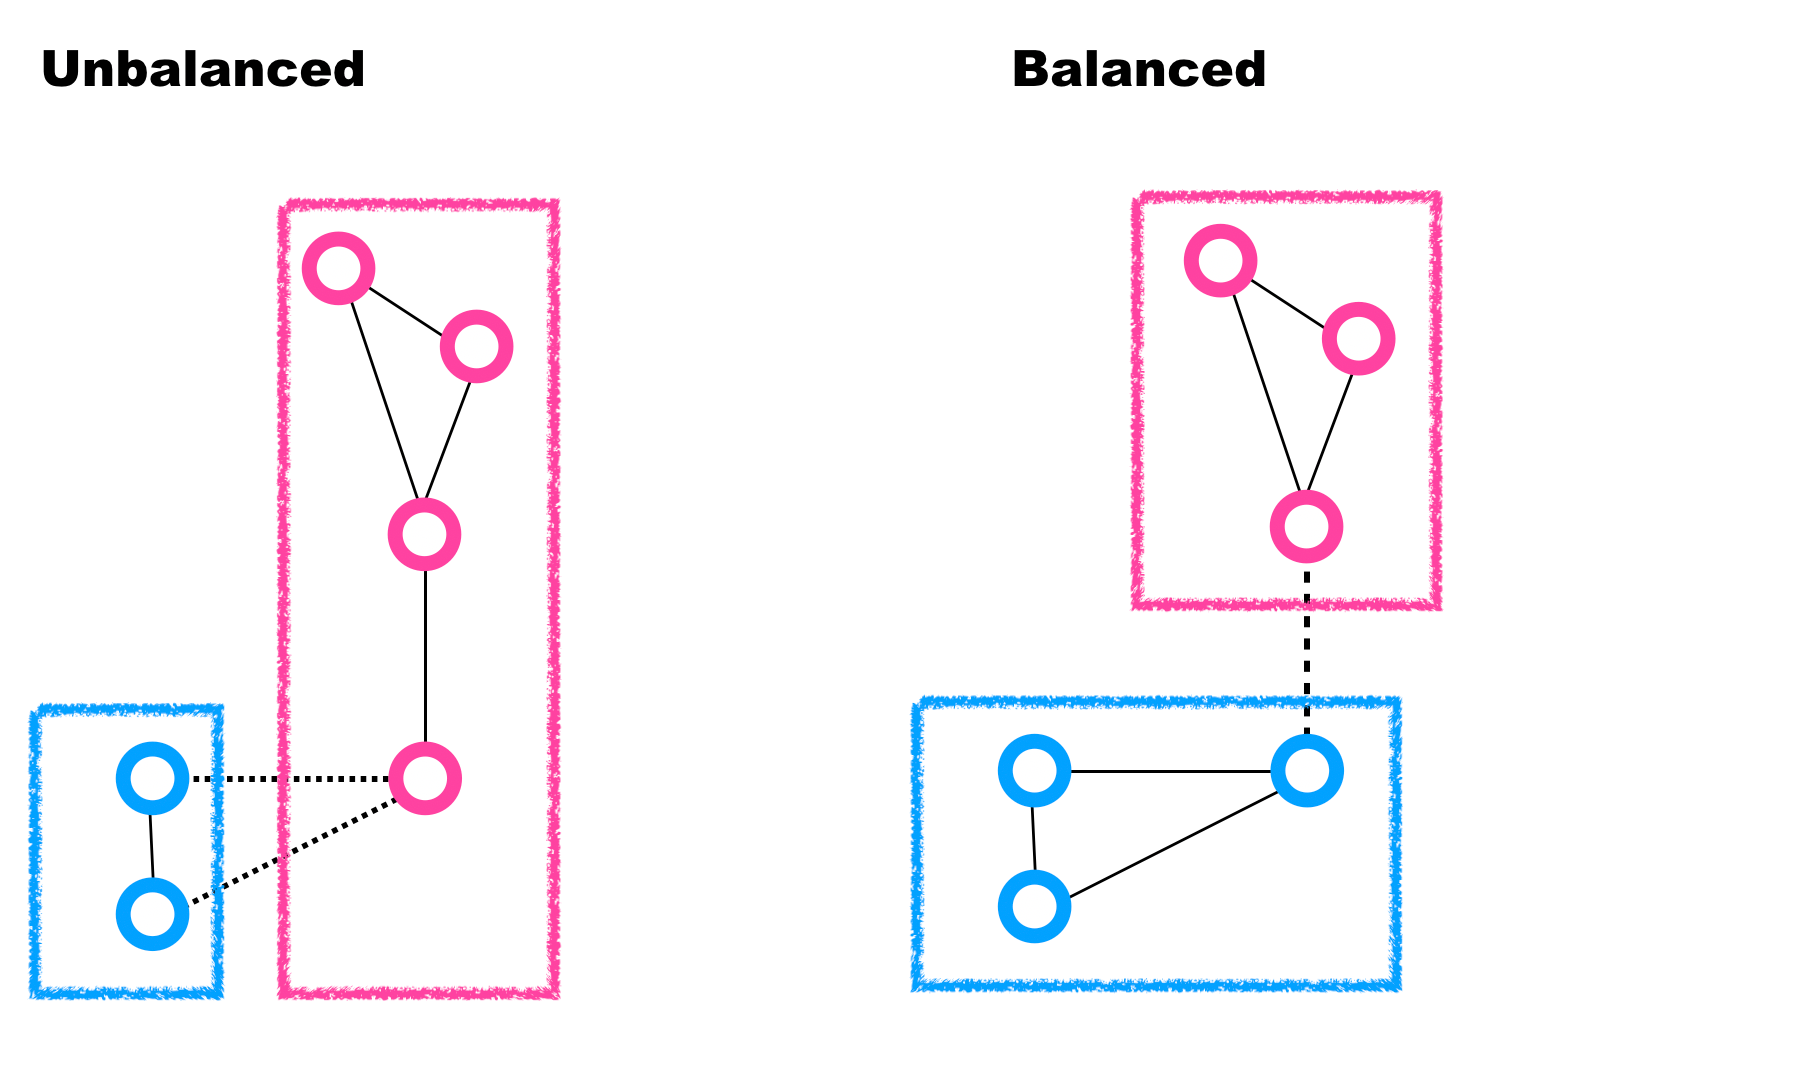
Given an undirected Graph G = (V, E), k i.e. a Graph G composed of a set of vertices V and edges E and a natural number k, we want to partition the vertex set V into k equal-sized subsets, so as to maximize the number of edges that have both endpoints in the same partition (we call these “local edges”).
Since OSRM uses Djikstra's algorithm to find the shortest route between two points and we know that the running time of Djikstra's is proportional to the sum of the number of edges and vertices - specifically, it is Θ(|E| + |V|log|V|), keeping our search space to the partition that contains both points dramatically speeds up the time required to find the shortest route.
For queries that involve points in different partitions (e.g. different cities or neighborhoods), OSRM implements an approach called Contraction Hierarchies (discussed in the next section) to speed up the shortest route calculation.
Contract the graph
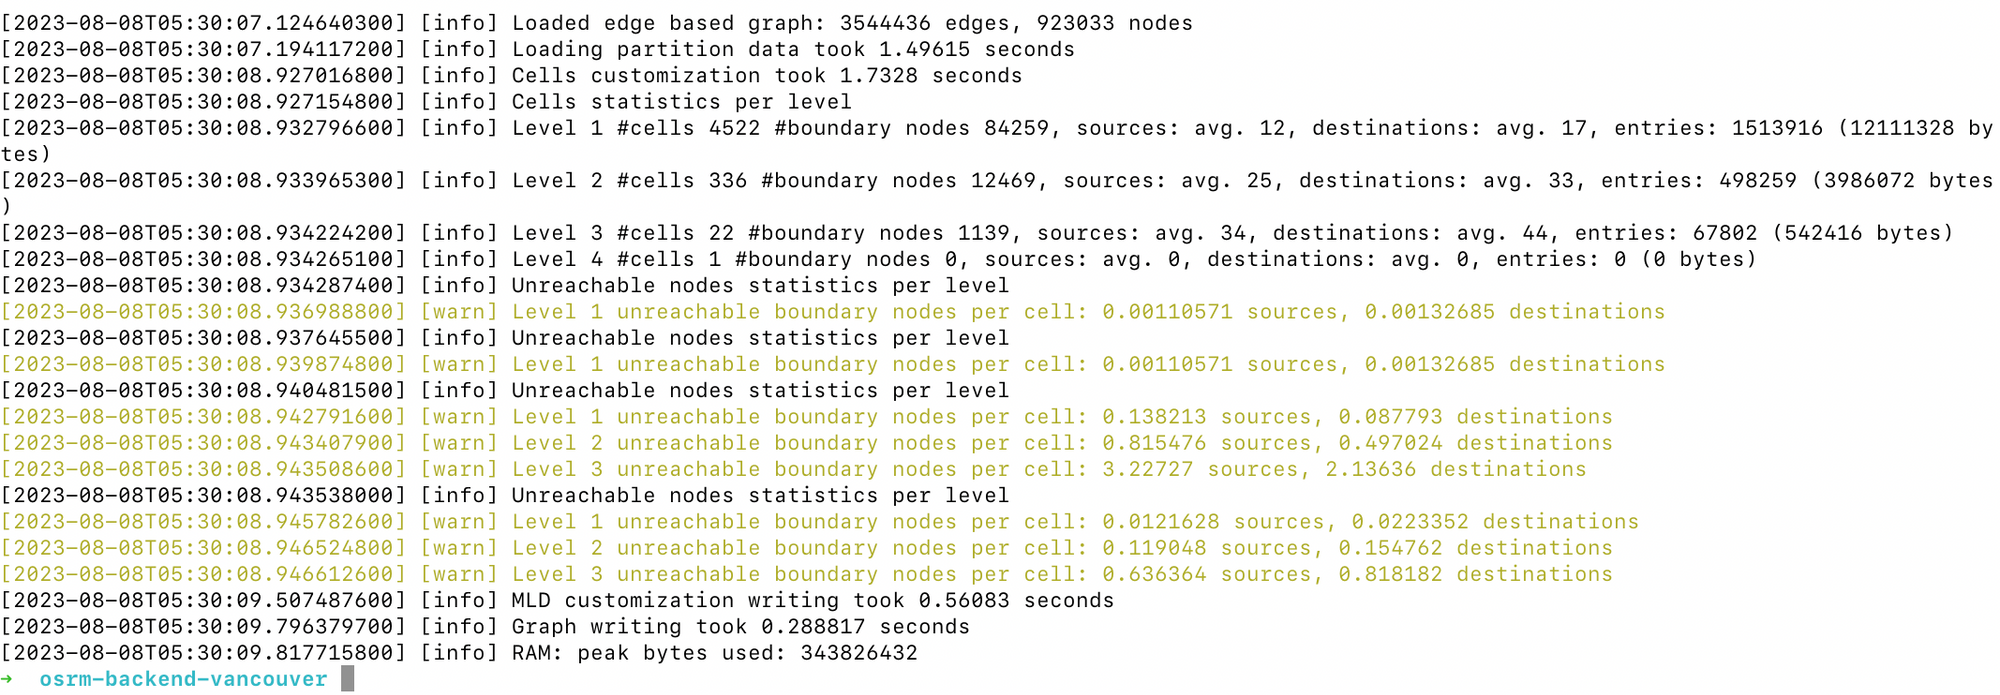
After running osrm-partition, run osrm-customize which optimizes the preprocessed road network data created during the data preparation (partitioning) phase.
docker run -t -v "${PWD}:/data" ghcr.io/project-osrm/osrm-backend osrm-customize /data/british-columbia-latest.osrm || echo "osrm-customize failed"
A key technique used in osrm-customize is Contraction Hierarchies. Here's the basic idea - suppose you have two different neighborhoods (in this example, North Vancouver (s) and East Vancouver (t) connected by a bridge and a highway. Between these two cities, there is a multitude of junctions leading to different neighborhoods and suburbs. Most drivers want to get from North Vancouver to East Vancouver directly, maybe as part of a larger route – and not take one of the exits on the way.

In this case, we can add a shortcut (bold arrow) and skip over the intermediate vertices and edges (dashed circles and lines). Applied all over the road network, this allows Djikstra's to complete in a handful of steps instead of hundreds of thousands (source).
After osrm-customize is run, you should see a success message with some statistics (run time, memory used and the number of vertices and edges processed).
The last step is to run the osrm-backend server and make a test API call.
Run osrm-backend
Start the server on port 5000 using osrm-routed, a command-line utility provided by OSRM that allows you to run a local server that listens to incoming routing requests and respond with the calculated routes and directions.
docker run -t -i -p 5000:5000 -v "${PWD}:/data" ghcr.io/project-osrm/osrm-backend osrm-routed --algorithm mld /data/british-columbia-latest.osrmYou should see a message confirming that a server is running on localhost:5000.

Make an API request
To confirm that OSRM is running, let's make a test call with OSRM's route service API, which finds the fastest route between two coordinates (be careful - the coordinates used must be in lng, lat format, unlike with Google Maps which uses lat, lng).
curl "http://127.0.0.1:5000/route/v1/driving/-123.1814231,49.195113;-123.4309008,49.0159777?steps=false"The above GET request returns the following JSON:
{
	"code": "Ok",
	"routes": [{
		"geometry": "clgkHvzynVda@_NgWqdEhPezDr}Bk|DrtFsA|oCquD`bJx@xqGjkMvjUl_^`pEt`CoHd}DhZt{@hbAjUnmBwbAjkB_GxwFjoAnoEjqF`sDzgHh\\gOjy@ysDsGeoDsd@eiB}hBg}AayHg_BkbGpBgzFb_Co{@qu@pC_|EqqAaW_bBbyDij@~pDeIdtDiyChgHgjBh|Hod@|tAsU{_@y_B|rB",
		"legs": [{
			"steps": [],
			"summary": "",
			"weight": 14005.2,
			"duration": 14005.2,
			"distance": 124022.5
		}],
		"weight_name": "routability",
		"weight": 14005.2,
		"duration": 14005.2,
		"distance": 124022.5
	}],
	"waypoints": [{
		"hint": "a8QEgH_EBIAAAAAABgAAAFICAAAIAAAAZdGfPvRKCkDvlndDdjJeQAAAAAAGAAAAUgIAAAgAAABGAgAApWao-C-o7gKRZqj4aajuAgoADxBaI0eB",
		"distance": 6.613154043,
		"name": "",
		"location": [-123.181403, 49.195055]
	}, {
		"hint": "6psHgOubB4AyAAAAAAAAAC8DAABbCAAAGrRfQgAAAADmj2JEd4QURTIAAAAAAAAALwMAAFsIAABGAgAAbzuj-BQj6wILmKT4quzrAggALxRaI0eB",
		"distance": 8696.109804009,
		"name": "Bodega Beach Drive",
		"location": [-123.520145, 48.964372]
	}]
}
The most interesting pieces of information returned are:
routes[0].legs[0].distance: the distance of the route in meters.
routes[0].legs[0].duration: the duration (travel time) of the route in seconds, and,
routes[0].geometry: the encoded polyline representing the route itself. This encoded polyline can be decoded using Mapbox's polyline.js library with precision level: 6. The route returned in the example above looks like this:
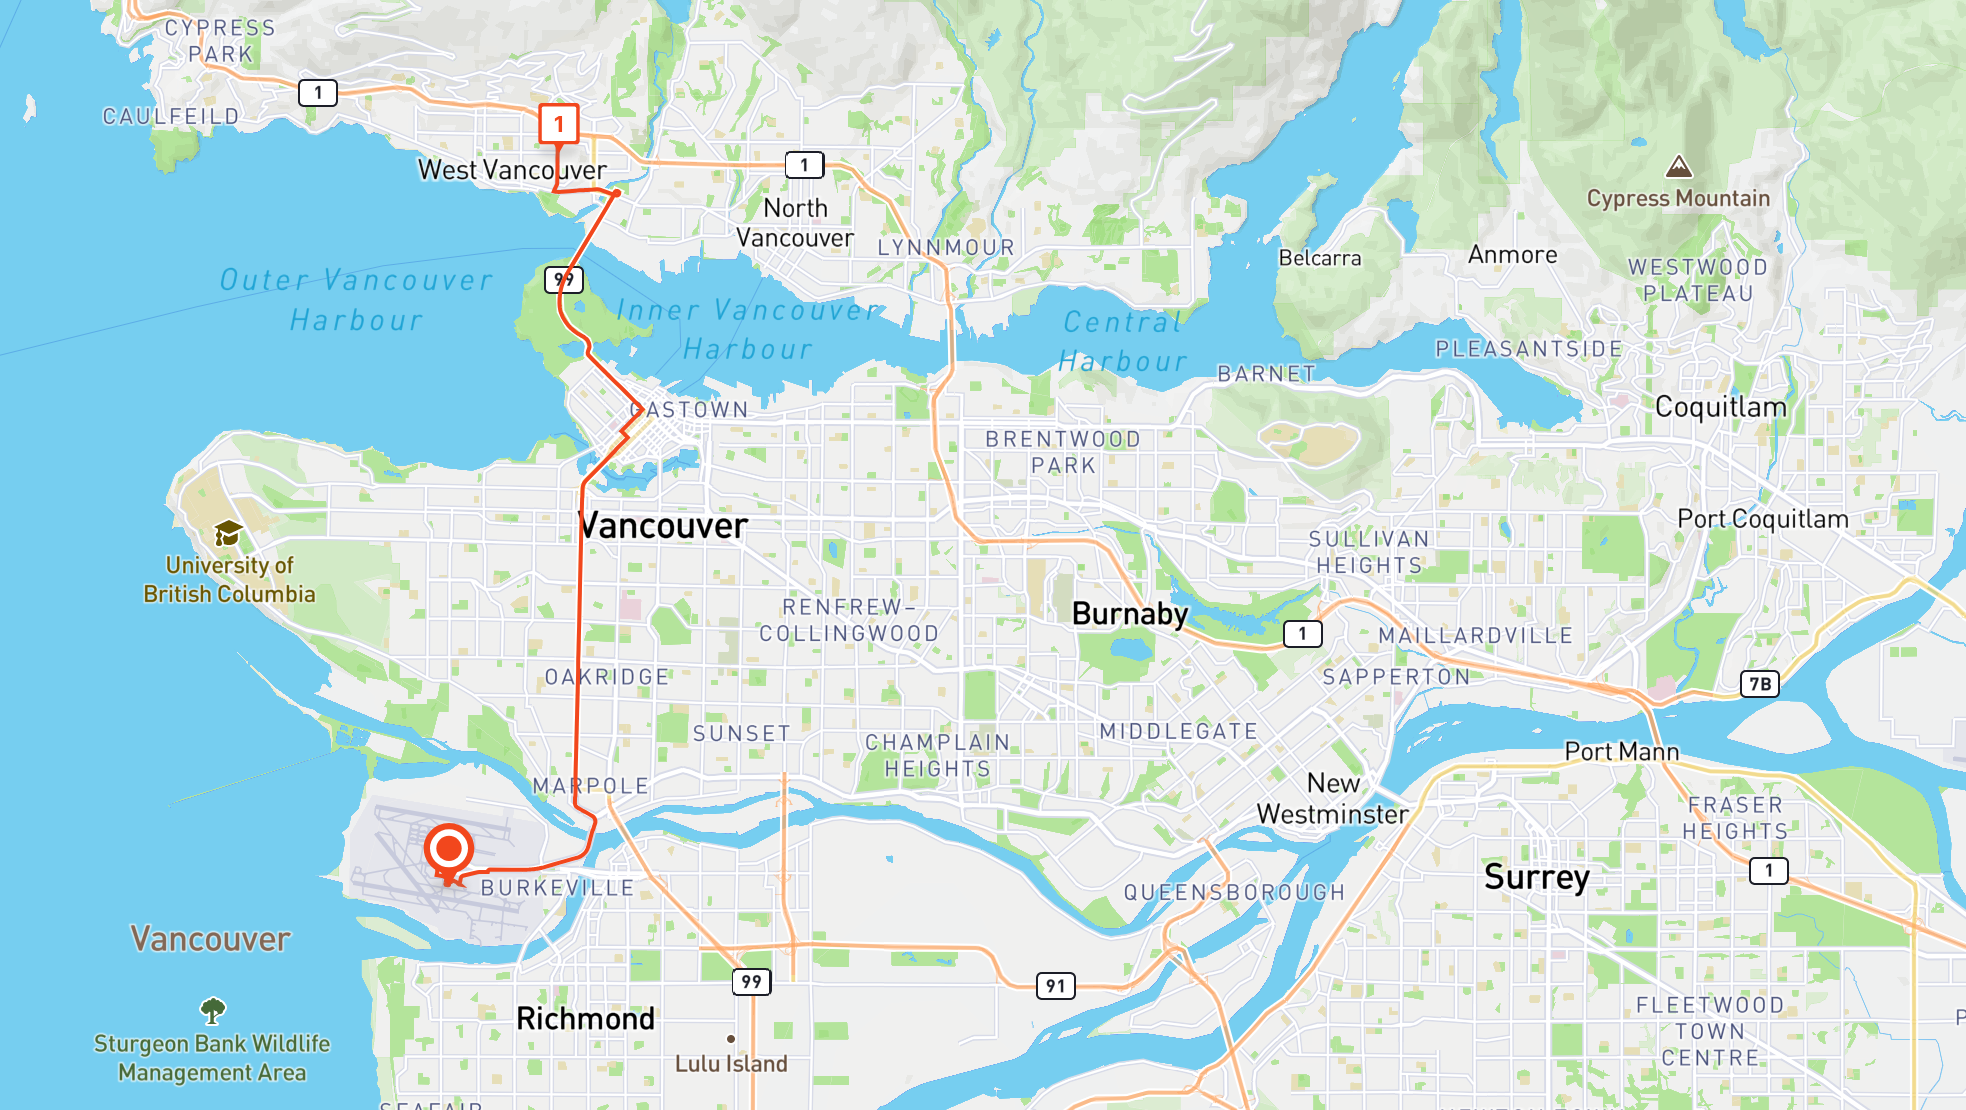
Now that we know how to run OSRM locally, we can move on to the next step, which is to run OSRM as a web service.
👋 As always, if you have any questions or suggestions for me, please reach out or say hello on LinkedIn.
Next: Part 2: Hosting the OSRM API on EC2: Running osrm-backend as a web service