Senakw Vancouver - will it block your view?
See the Senakw Project on a Photorealistic 3D Map. Discover the project's scale, potential sightline changes, and what it means for local residents.

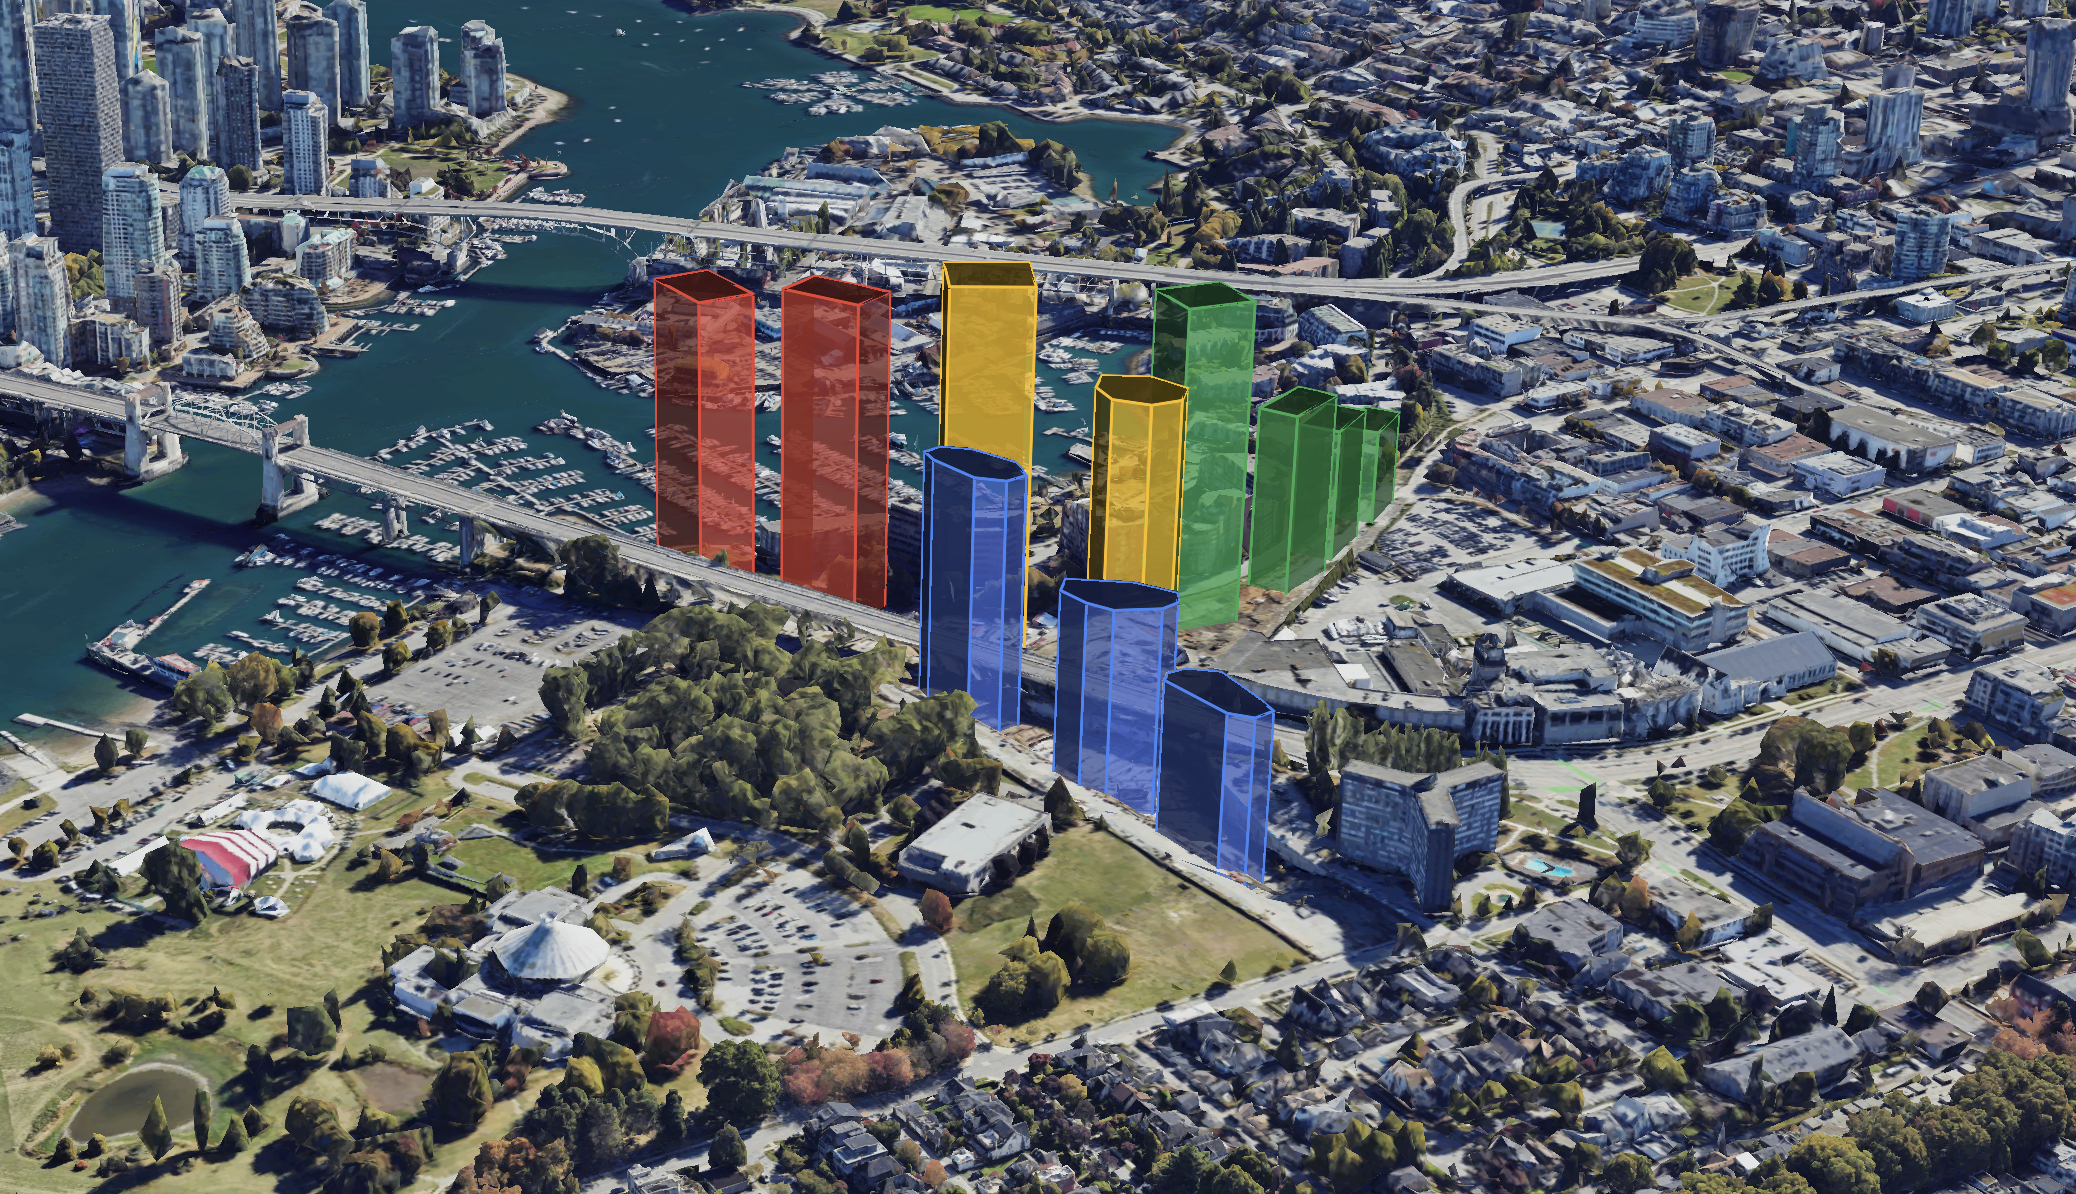
The Senakw Project is on a relatively small parcel of Squamish reserve land at the foot of the Burrard Bridge, across from downtown Vancouver. The Squamish Nation and Westbank are building 6000 rental apartments (80% market rentals cross-subsidizing 20% non-market rentals), in the form of high-rises up to 60 storeys. The height and density of the project reflects the extreme shortage of housing in Vancouver, and thus sky-high market rents. Because it's Squamish reserve land, the city of Vancouver's extremely restrictive zoning laws don't apply. (Five minutes away at 1000 Cypress Street, there's an old two-storey, eight-unit rental apartment building from 1972. Under the city of Vancouver's laws, it's illegal to replace it with a new building of the same size.)
The interactive web app at https://senakw.afi.dev/ lets you enter any Vancouver address to visualize how the Senakw development will appear from that location, allowing you to see firsthand if it will impact your view of the city skyline.
Part 1: What is the Google Photorealistic 3D Tiles API?
Part 2: How to pan, zoom, and adjust tilt on Google Maps 3D
Part 3: Use Place Autocomplete to go anywhere on Google Maps 3D
Part 4: Add map markers, overlays and polylines to Google Maps 3D
Part 5: Add a 3D polygon to a Google Photorealistic 3D Map
Part 6: Senakw Vancouver - will it block your view? (this article)
How did we build the Senakw Vancouver web app?
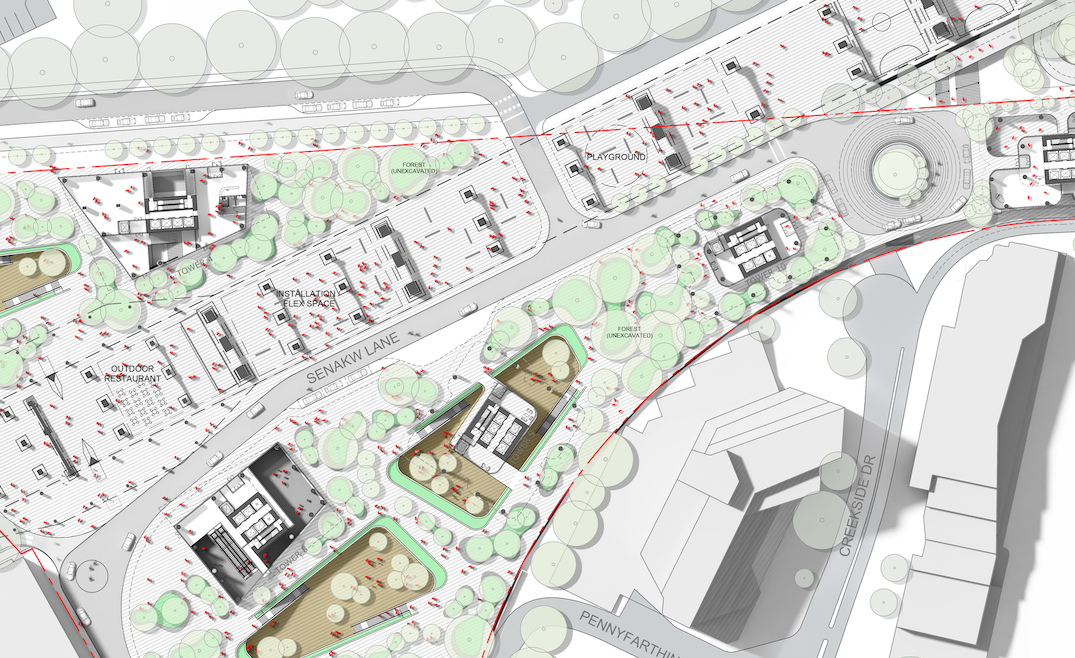
We used Google Photorealistic 3D Tiles for the three dimensional base map and added the building envelopes manually, using publicly available data from the City of Vancouver Senakw Development website and various online publications.
The view finder that lets you enter an address and get the view from your selected location uses Google Place Autocomplete to retrieve the latitude and longitude of your selected location. Using these coordinates, we can:
- Calculate the haversine distance from the address to the Senakw Development (49.273605, -123.142647). This is how far away your are, also known as range.
/*** utils/maputils.js ***/
export function calculateDistance(point1, point2, unit = "meters") {
  const { lat: lat1, lon: lon1 } = point1;
  const { lat: lat2, lon: lon2 } = point2;

  const lat1Rad = GeoConverter.toRadians(lat1);
  const lat2Rad = GeoConverter.toRadians(lat2);
  const deltaLat = GeoConverter.toRadians(lat2 - lat1);
  const deltaLon = GeoConverter.toRadians(lon2 - lon1);

  const a =
    Math.sin(deltaLat / 2) * Math.sin(deltaLat / 2) +
    Math.cos(lat1Rad) *
      Math.cos(lat2Rad) *
      Math.sin(deltaLon / 2) *
      Math.sin(deltaLon / 2);

  const centralAngle = 2 * Math.atan2(Math.sqrt(a), Math.sqrt(1 - a));
  const radius =
    unit === "kilometers"
      ? GEO_CONSTANTS.EARTH_RADIUS.KILOMETERS
      : GEO_CONSTANTS.EARTH_RADIUS.METERS;

  return radius * centralAngle;
} - Compute the heading (measured in degrees clockwise, from North) between the selected address and Senakw. This is your viewing angle.
/*** utils/maputils.js ***/
export function calculateHeading(point1, point2) {
  const { lat: lat1, lon: lon1 } = point1;
  const { lat: lat2, lon: lon2 } = point2;

  const lat1Rad = GeoConverter.toRadians(lat1);
  const lat2Rad = GeoConverter.toRadians(lat2);
  const deltaLonRad = GeoConverter.toRadians(lon2 - lon1);

  const y = Math.sin(deltaLonRad) * Math.cos(lat2Rad);
  const x =
    Math.cos(lat1Rad) * Math.sin(lat2Rad) -
    Math.sin(lat1Rad) * Math.cos(lat2Rad) * Math.cos(deltaLonRad);

  const angleRad = Math.atan2(y, x);
  const heading = (GeoConverter.toDegrees(angleRad) + 360) % 360;

  return Math.round(heading);
}
Once we get the heading and range, it's really easy to use the Photorealistic 3D Tiles API's flyCameraTo() function to plant our camera at the correct spot range meters away from Senakw, facing heading degrees due North.
/*** components/Map3D.jsx ***/
map3D.flyCameraTo({
  endCamera: {
    center: {
      lat: senakw.lat,
      lng: senakw.lng,
      altitude: 100,
    },
    range: calculateDistanceInMeters(lat, lng, senakw.lat, senakw.lng),
    tilt: 90,
    heading: calculateHeading(lat, lng, senakw.lat, senakw.lng),
  },
  durationMillis: 5000,
});
If you'd like to know more or work together with me on similar projects, please get in touch.
This concludes our tutorial series on the Google Photorealistic 3D Tiles API. Throughout this journey, we've explored how to set up a foundational 3D scene, control camera movements, navigate between locations, and incorporate map markers, polylines, and polygons into a Google Photorealistic 3D Map. With these skills, you’re well-equipped to start building thoughtful, web based 3D mapping applications. Happy mapping!
Part 1: What is the Google Photorealistic 3D Tiles API?
Part 2: How to pan, zoom, and adjust tilt on Google Maps 3D
Part 3: Use Place Autocomplete to go anywhere on Google Maps 3D
Part 4: Add map markers, overlays and polylines to Google Maps 3D
Part 5: Add a 3D polygon to a Google Photorealistic 3D map
Part 6: Senakw Vancouver on a Photorealistic 3D Map. Will it block your view?
👋 As always, if you have any questions or suggestions for me, please reach out or say hello on LinkedIn.