> ## Content Index
> Fetch the complete content index at: https://blog.afi.io/llms.txt
> Use this file to discover other available public pages before exploring further.
# Work with Google Maps React map markers and info windows
- URL: https://blog.afi.io/blog/work-with-google-maps-react-map-markers-and-info-windows/
- Published: 2026-04-07T00:29:51.000Z
- Updated: 2026-08-21T05:11:15.000Z
- Description: How to add map markers and info windows to Google Maps using the Marker and AdvancedMarker components of the Google Maps React library.
- Author: Afian Anwar
- Tags: googlemaps
In part 3 of our ongoing series on the Google Maps [React component library](https://visgl.github.io/react-google-maps/?ref=blog.afi.io), I'll show you how to use the `` and `` components to add interactivity to your app.
Part 1: [React Google Maps: Build with Google Maps using React](https://blog.afi.io/blog/react-google-maps-build-with-google-maps-using-react/)
Part 2: [Google Maps with React: Add a Google Map and style it](https://blog.afi.io/blog/react-google-maps-build-with-google-maps-using-react/)
**Part 3: Work with Google Maps React map markers and info windows (this article)**
Part 4: [Draw a Google Maps polyline in React](https://blog.afi.io/blog/draw-a-google-maps-polyline-in-react/)
Part 5: [Three ways to add Google Autocomplete to your React app](https://blog.afi.io/blog/three-ways-to-add-google-autocomplete-to-your-react-app/)
### How to add a basic map marker using the Google Maps React component library
Map markers identify a location on a map without obscuring it. In Google Maps, they're teardrop shaped by default, but highly customizable, as you'll soon see. To add a basic map marker using the [@vis.gl/react-google-maps](https://visgl.github.io/react-google-maps/?ref=blog.afi.io) Google Maps React component library, follow these steps:
1. Import the `Marker` component from the [@vis.gl/react-google-maps](https://visgl.github.io/react-google-maps/?ref=blog.afi.io) library.
```
import {Marker} from '@vis.gl/react-google-maps';
```
1. Nest a `` component inside your `` component. The `position` prop accepts an object with `lat` and `lng` values that tell the marker where to place itself on the map.
```
;
```
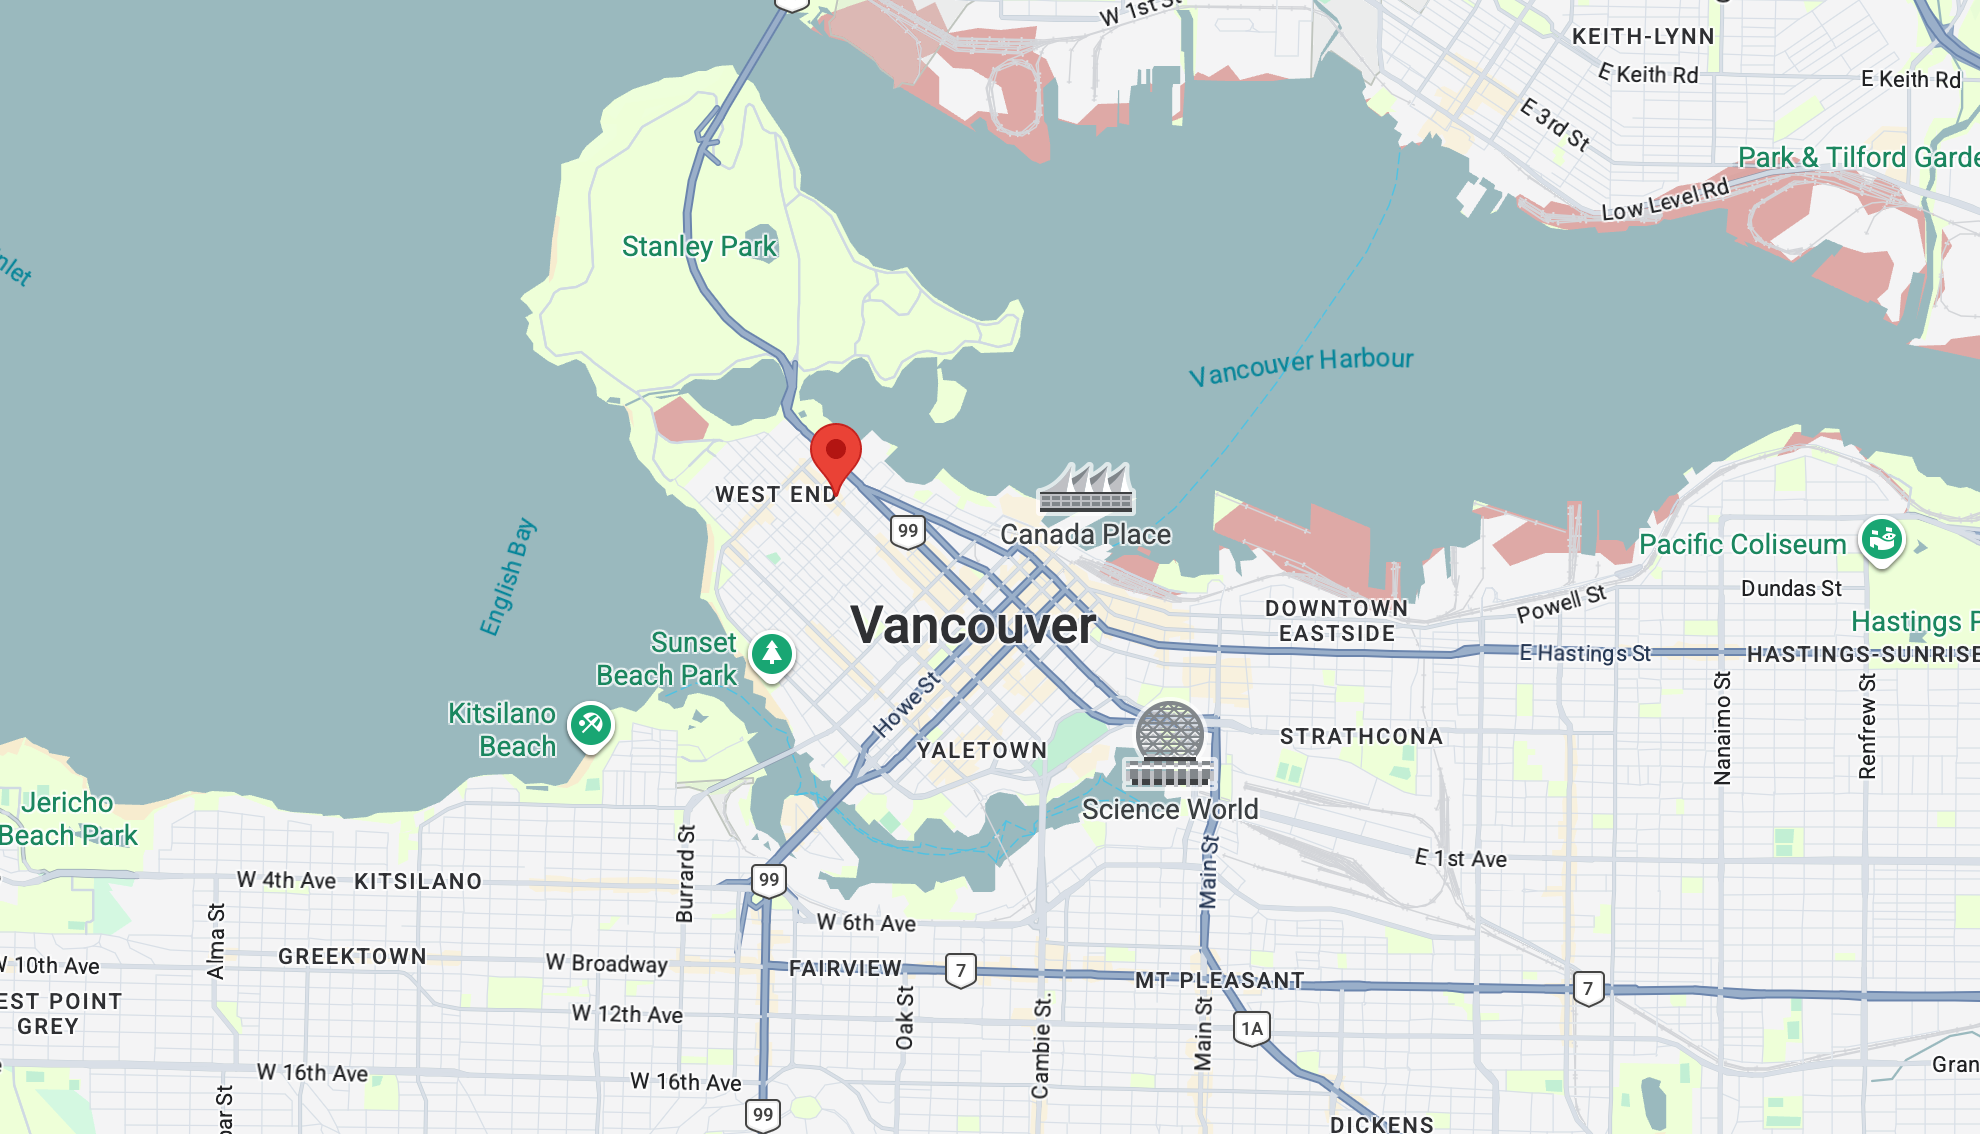
The result is the classic ballon shaped [red marker](https://cloud.google.com/find-a-partner/partner/afi-labs-cloud-services-inc?ref=blog.afi.io). The point at the bottom anchors it to the exact location on the map specified in the `position` prop.
### Adding an info window to Google Maps React map marker
A marker alone only tells you *where* something is, not *what* it is. That's where [info windows](https://developers.google.com/maps/documentation/javascript/infowindows?ref=blog.afi.io) come in. Info windows are popup windows that appear above a marker when you click on them. In [@vis.gl/react-google-maps](https://visgl.github.io/react-google-maps/?ref=blog.afi.io), the way to anchor info windows to a map marker is by having an `` component as a sibling to ``, combined with a piece of state to track whether the marker has been clicked.
1. Import the `InfoWindow` component from [@vis.gl/react-google-maps](https://visgl.github.io/react-google-maps/?ref=blog.afi.io).
```
import { InfoWindow } from '@vis.gl/react-google-maps';
```
1. Above the return statement of `App.jsx`, add a boolean state variable called `open`, initialized to `false`. When you call `setOpen(true)` the info window shows, and `setOpen(false)` hides it. Also, import the `useState` React hook.
```
import { useState } from "react";
function App() {
const [open, setOpen] = useState(false);
return //... Rest of App.jsx return statement
;
}
```
1. Use conditional rendering to selectively display the `` component alongside ``. When `open` is set to true, the info window and any content inside it should display. But it doesn't. Why?
```
{
open && (
Zabu Zabu Chicken. Yum!
);
}
```
1. It doesn't show because we need to wire up the event handler props `onClick` and `onCloseClick` to toggle the info window on or off like this (code block below). When the marker is clicked, `open` is set to `true` and the info window is displayed. When the \[x\] button in the top right is clicked, `open` is set to `false`, the app is re-rendered and the info window is hidden.
```
setOpen(true)}
>
{
open && (
setOpen(false)}>
Zabu Zabu Chicken. Yum!
);
}
```
1. Now if we run the app and try again, the info window still won't show. That's because React doesn't know where to display it. To fix this (and get the info window finally working) we need to pass a `ref` to the marker and use it as the anchor. Here's what I mean.
```
setOpen(true)}
>
{
open && (
setOpen(false)}>
Zabu Zabu Chicken. Yum!
);
}
```
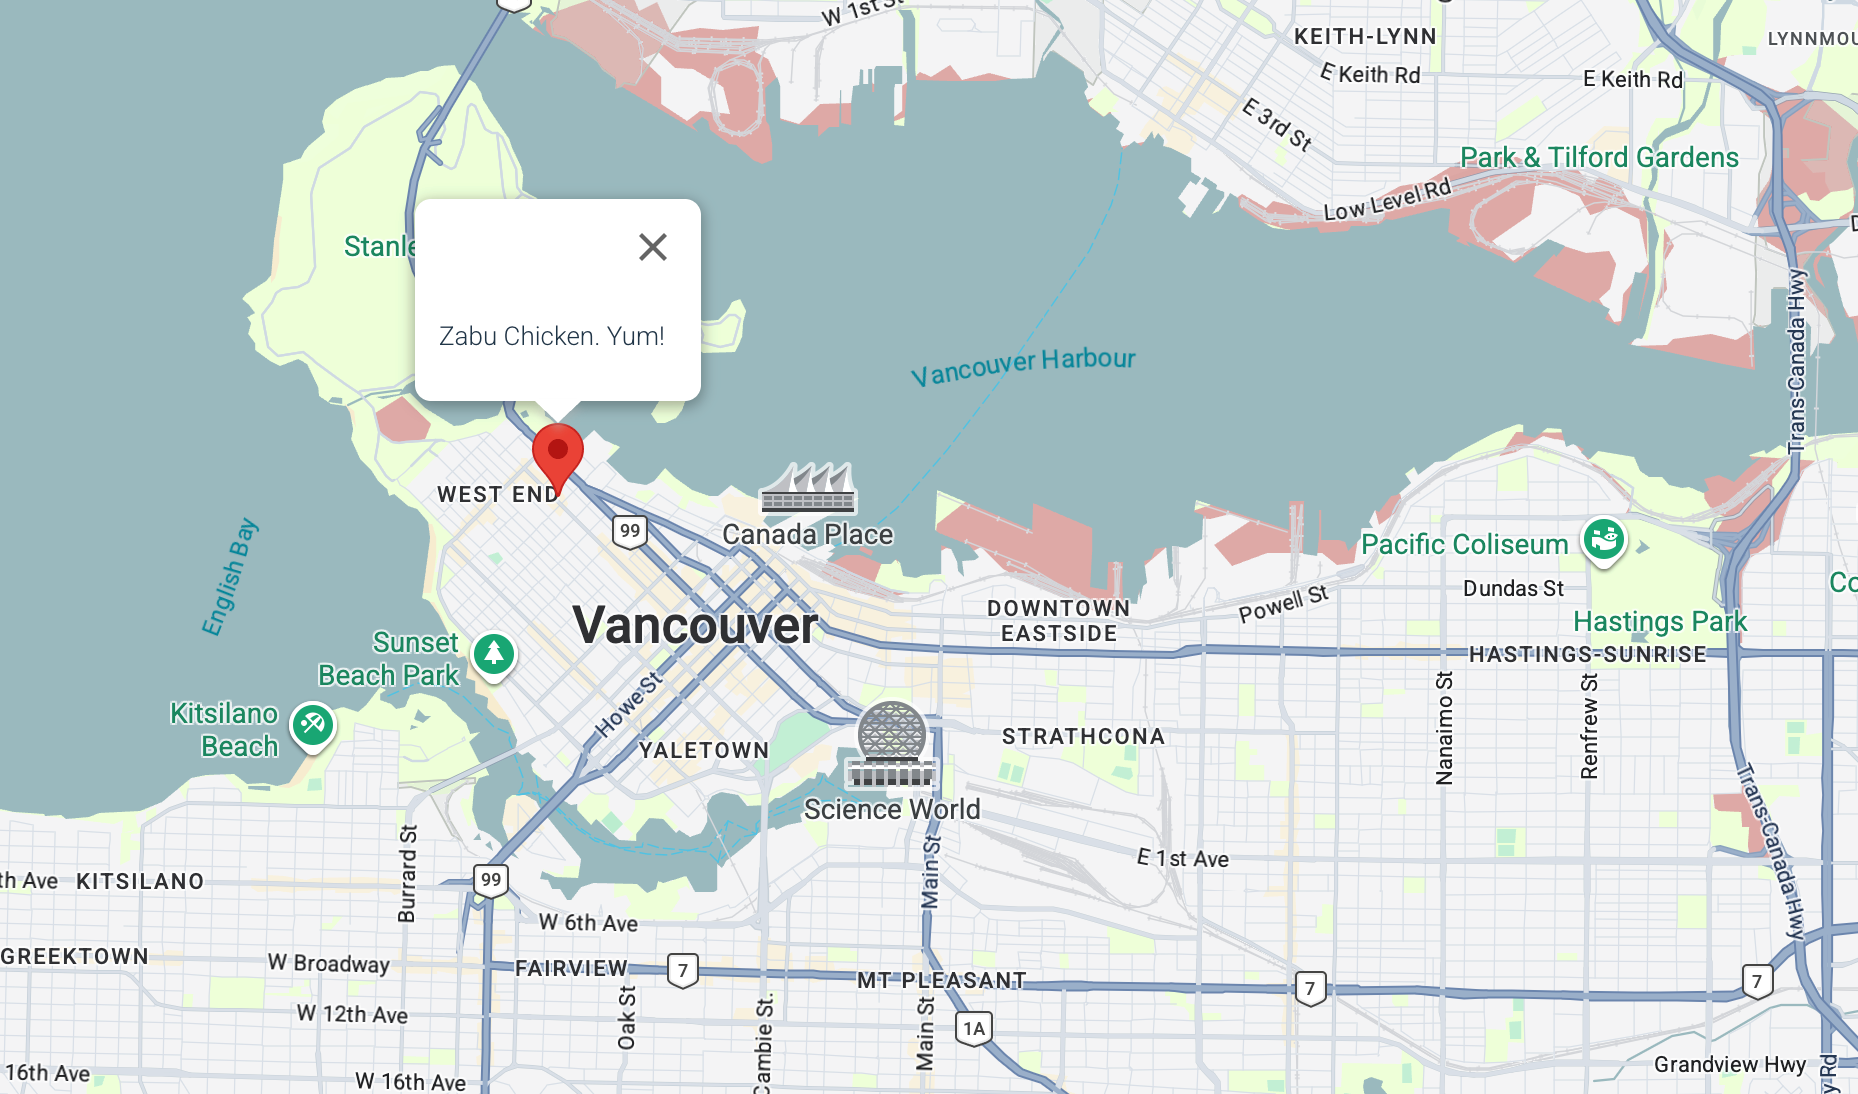
The `ref` prop is a special React prop. When you pass `ref={markerRef}` to a component, React automatically sets `markerRef.current` to the underlying DOM element, which in this case is the map marker you just clicked. Here's what the final result looks like:
### Using the Advanced Marker element on Google Maps
The default marker gets the job done, but if you want full control over how your markers look, use `` instead. Under the hood it's a React wrapper for Google's [AdvancedMarkerElement](https://developers.google.com/maps/documentation/javascript/reference/advanced-markers?ref=blog.afi.io). Style it any way you want with CSS, drop in an SVG, use a PNG, or even a photo of the location. With `` your markers can be anything: a custom branded icon, an animated SVG, a React component showing a price tag like Airbnb does, or a photo of the location.
In this section, I'll show you three ways to style your markers:
1. With custom CSS styles and HTML
2. By using a `` component (a wrapper for the [PinElement](https://developers.google.com/maps/documentation/javascript/reference/advanced-markers?ref=blog.afi.io#PinElement))
3. Embedding a PNG or SVG file
But before I do so, first import the `AdvancedMarker` and `Pin` components from [@vis.gl/react-google-maps](https://visgl.github.io/react-google-maps/?ref=blog.afi.io).
```
import {AdvancedMarker, Pin} from '@vis.gl/react-google-maps';
```
**Styling Google map markers with custom CSS and HTML**
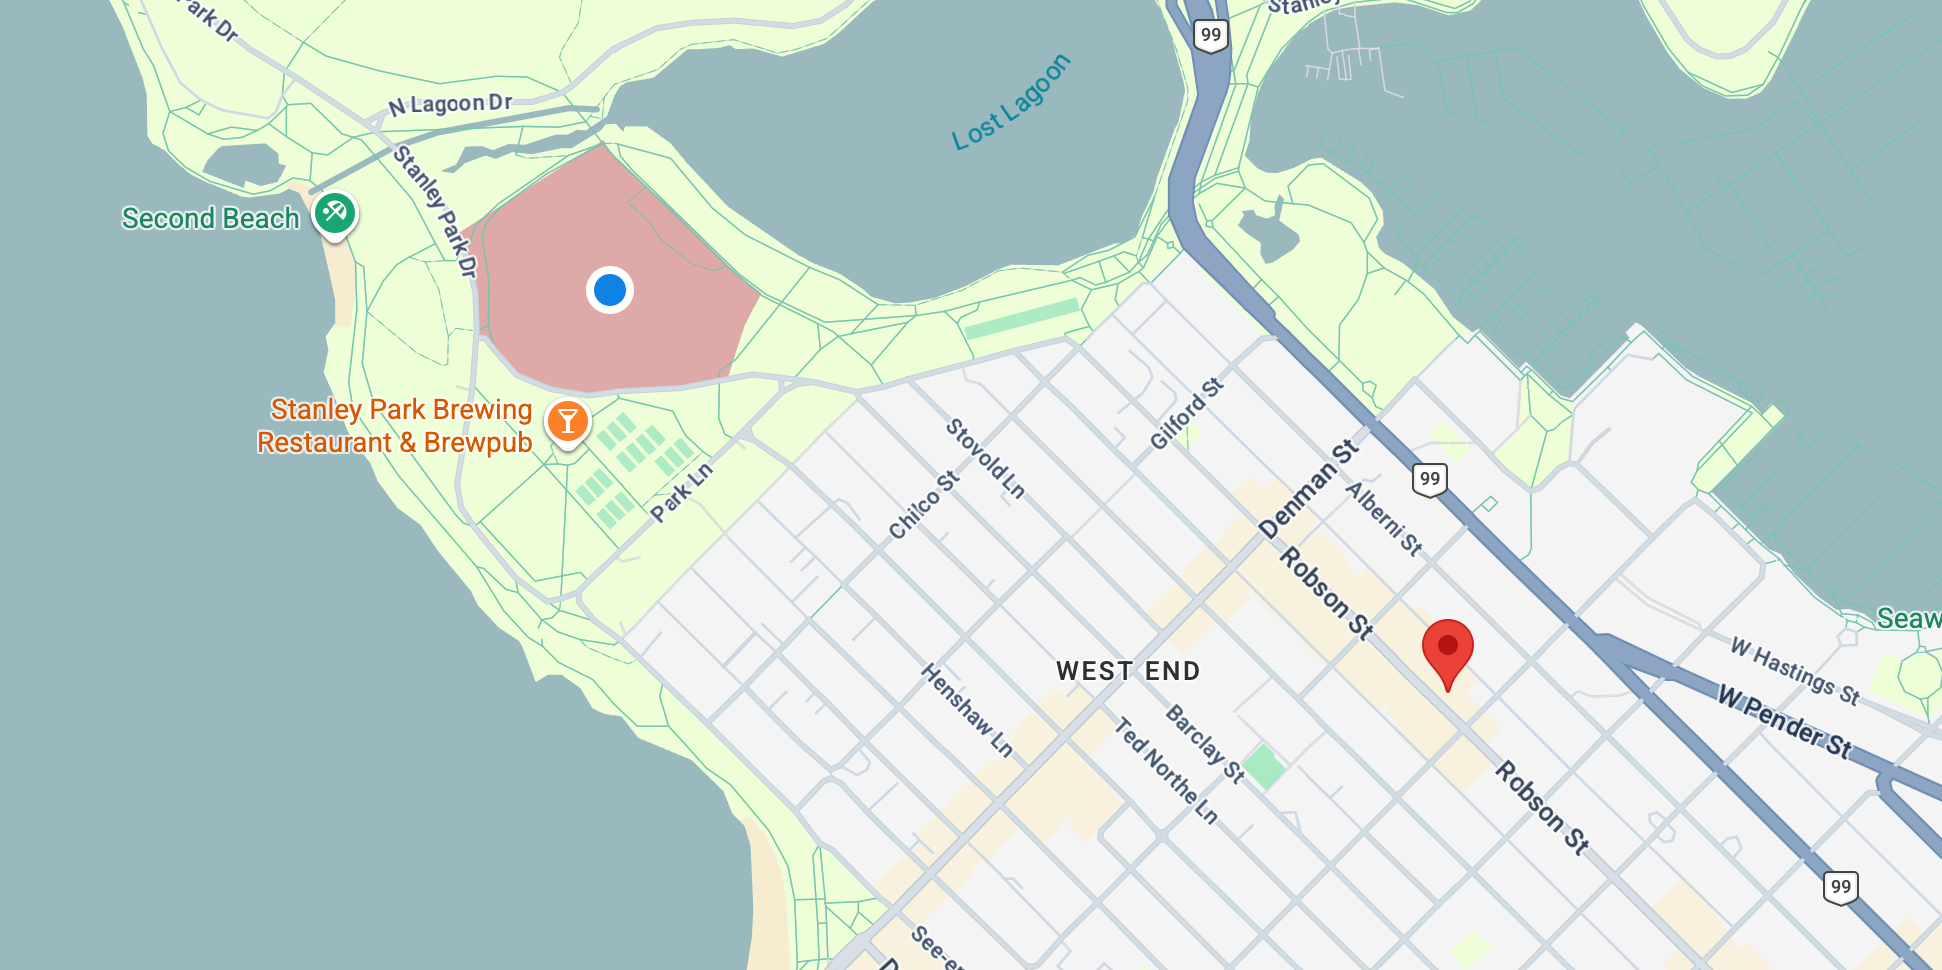
Because meaning the `AdvancedMarkerElement` is just a regular DOM element, it can be easily styled using HTML and CSS. For example, if you are building an asset tracking app and want to a blue dot to represent a device's real time location, you can embed a div inside `` and style it accordingly.
```
```
**Add custom Google Map markers using a Pin component**
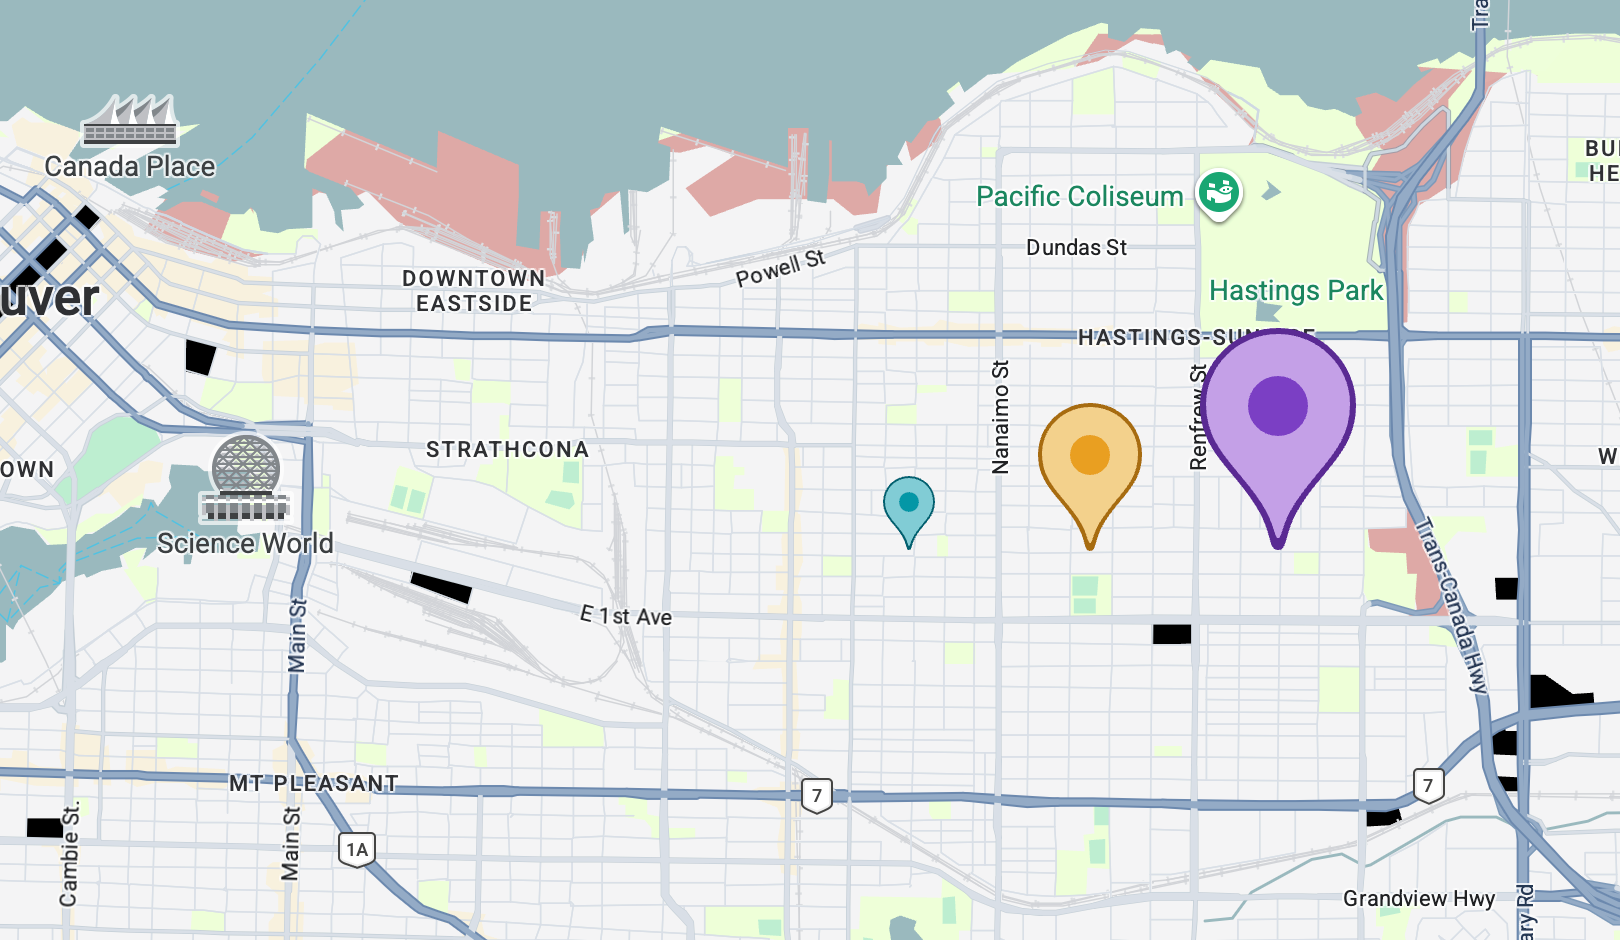
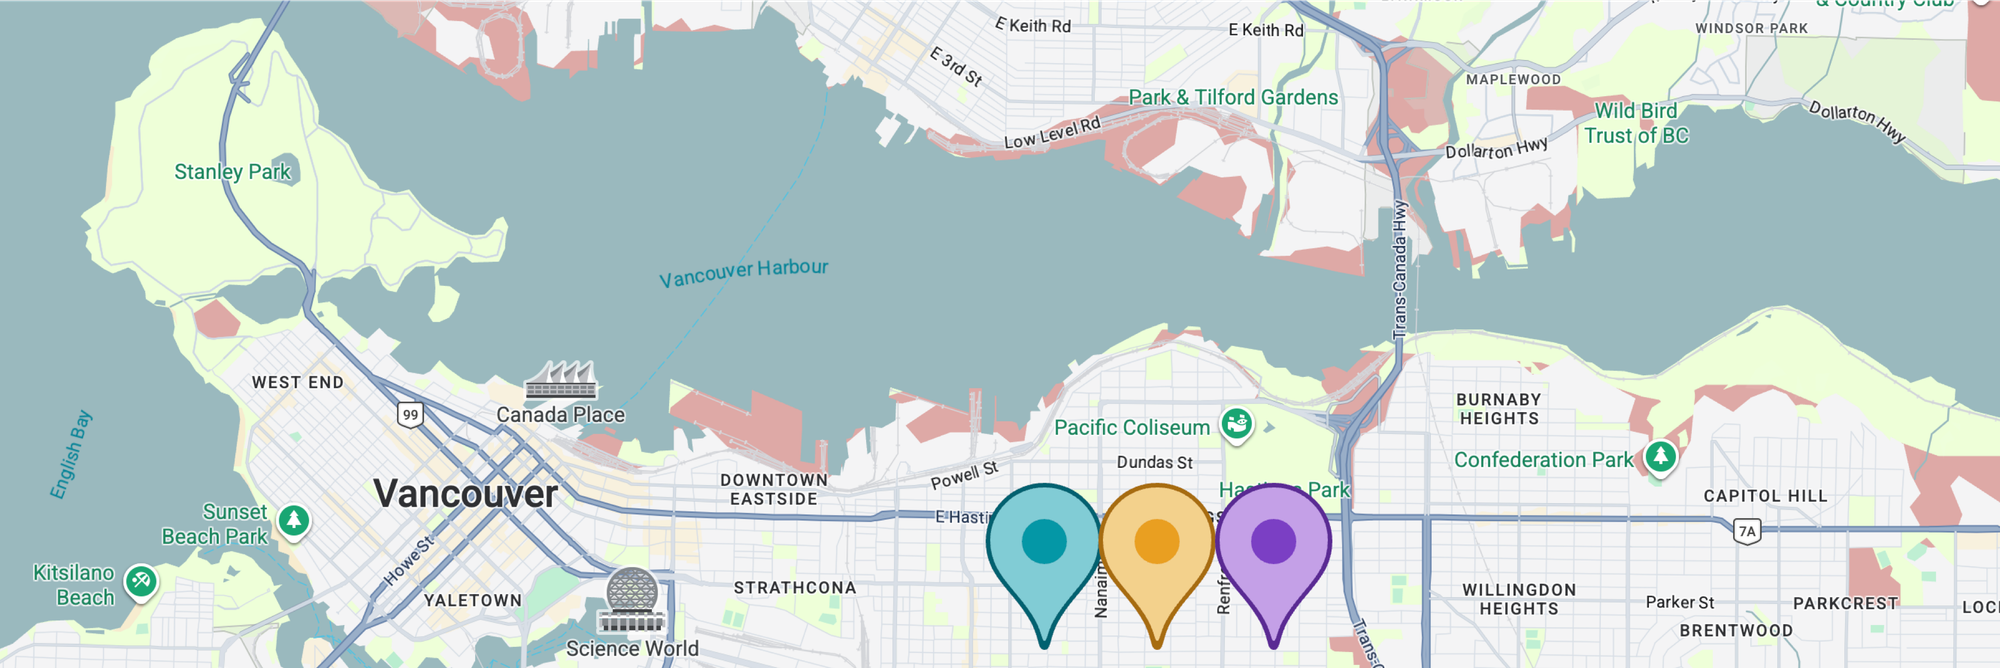
If you like how the default ballon pin looks but want to change its color, size or other attributes, consider using a `` component instead and using props to modify how it looks. The code below creates three custom markers of different colors (`glyphColor`, `background` and `borderColor`) and sizes (`scale`).
```
;
```
`background` is the main body color of the pin.
`borderColor` is the color of the pin's border.
`glyphColor` is the color of the dot in the center.
`glyph` lets you replace the default dot with a string, letter, number, or emoji e.g. `glyph='🍕'` gives you the marker icon below.
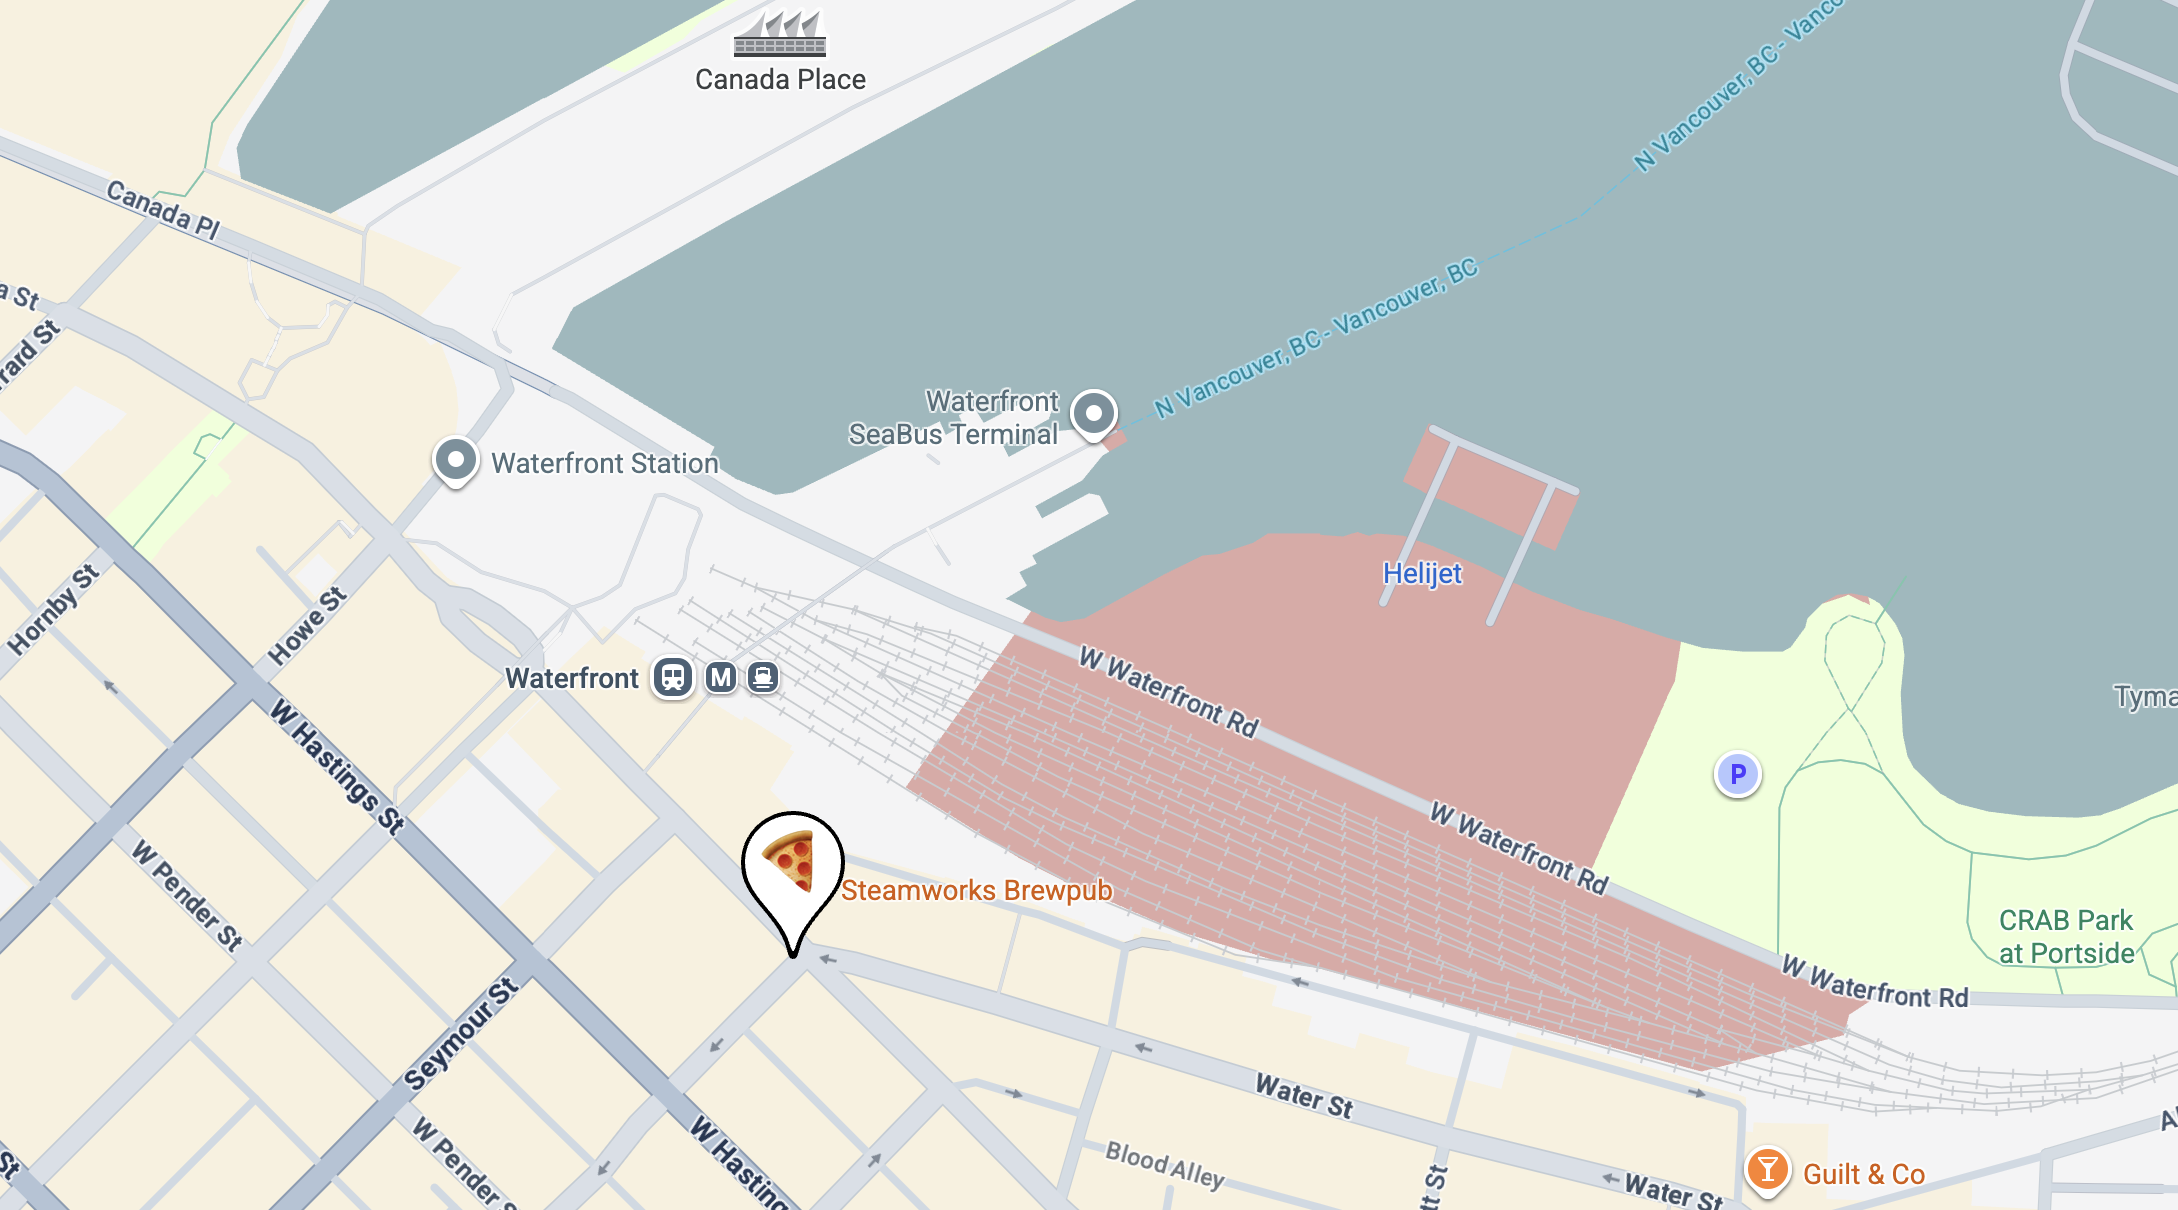
`scale` increases or decreases the size of the pin.
**Using PNG or SVG files as a Google Map custom marker**
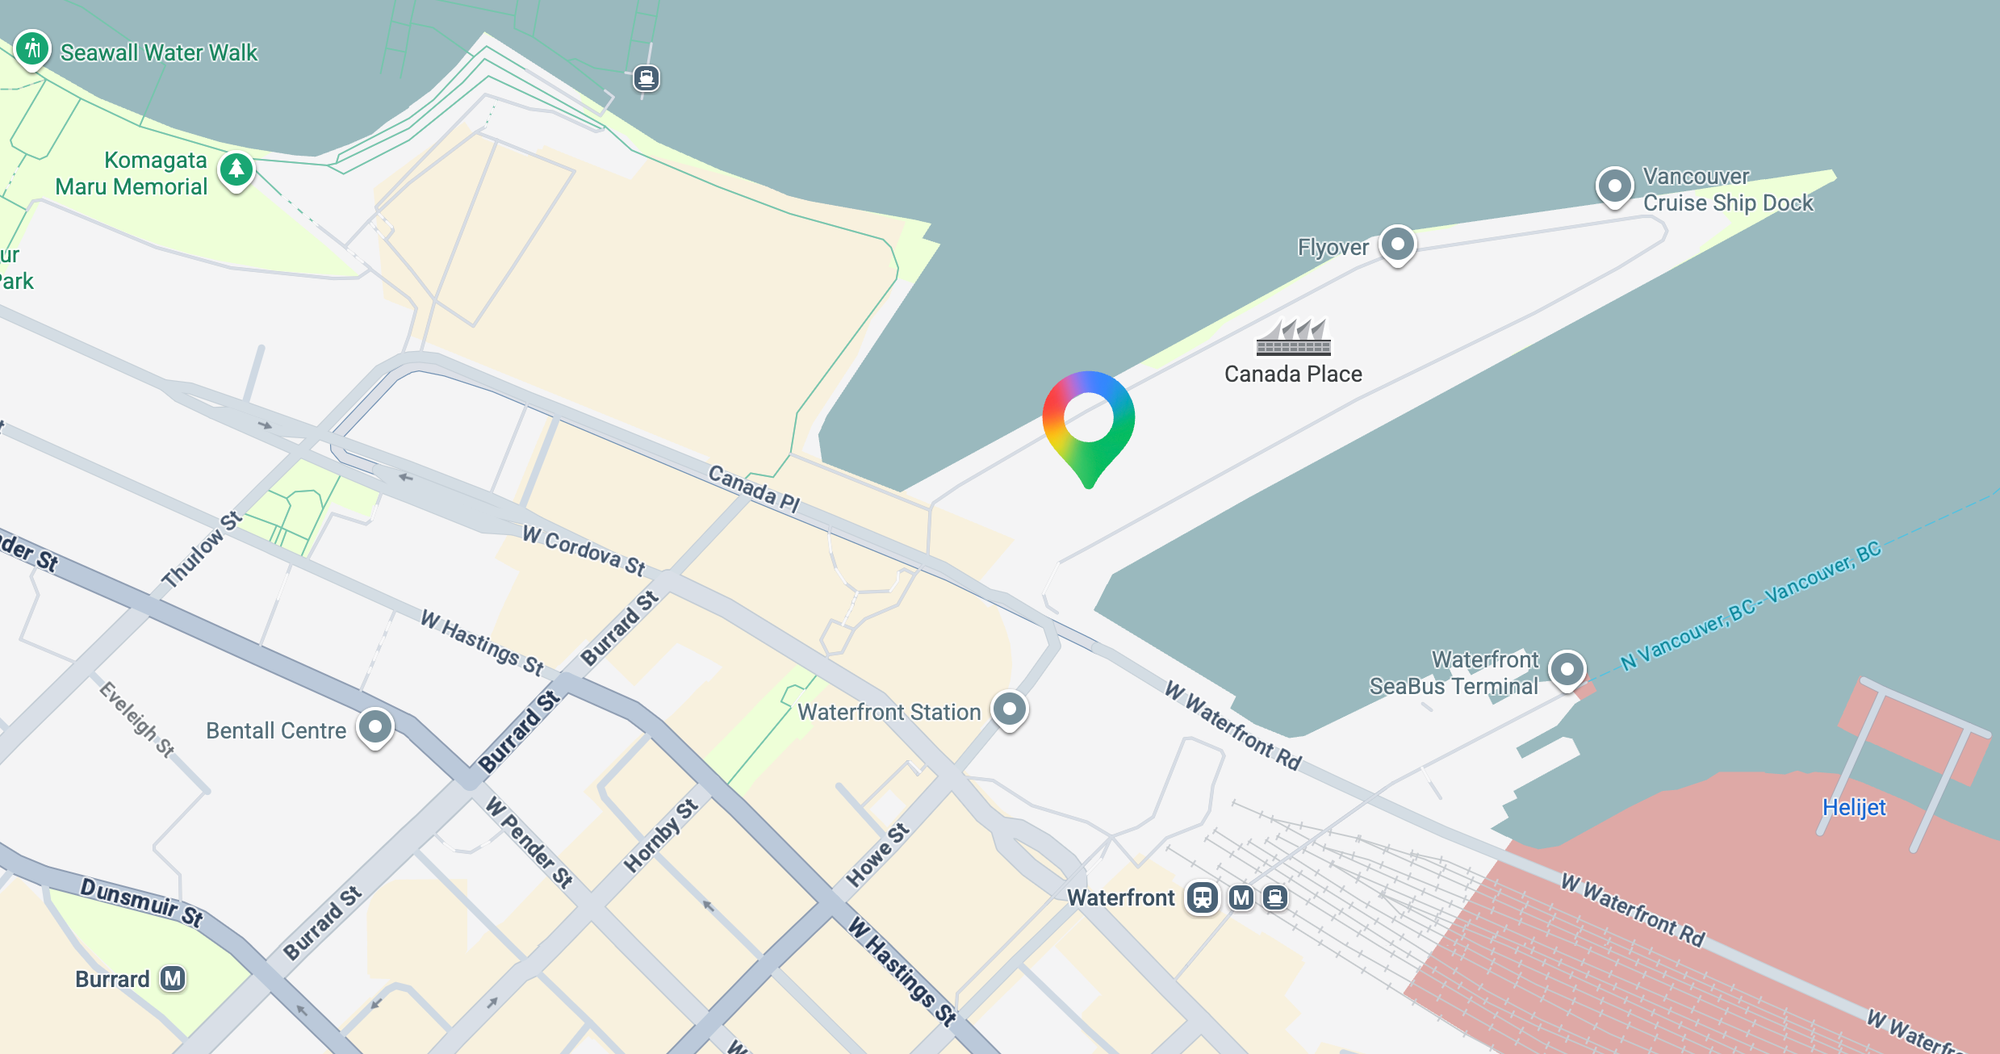
The last way to customize a Google Maps `` component is by embedding a Portable Network Graphic (PNG) or Scalable Vector Graphic (SVG) file into an `![]() ` tag. For example, lets say we want to use the [new 2026 Google Maps logo](https://9to5google.com/2026/03/03/google-maps-gradient-icon/?ref=blog.afi.io) as a map marker.
First, [download](https://commons.wikimedia.org/wiki/File:Google%5FMaps%5Ficon%5F%282026%29.svg?ref=blog.afi.io) the SVG version of the logo and save it in the `/assets` folder of your project.
Second, import it into `App.jsx` with this line:
```
import markerIcon from './assets/gmp-new-logo-2026.svg';
```
Third, add an `
` tag. For example, lets say we want to use the [new 2026 Google Maps logo](https://9to5google.com/2026/03/03/google-maps-gradient-icon/?ref=blog.afi.io) as a map marker.
First, [download](https://commons.wikimedia.org/wiki/File:Google%5FMaps%5Ficon%5F%282026%29.svg?ref=blog.afi.io) the SVG version of the logo and save it in the `/assets` folder of your project.
Second, import it into `App.jsx` with this line:
```
import markerIcon from './assets/gmp-new-logo-2026.svg';
```
Third, add an `![]() ` tag with the the SVG as its source file and add it as a child of ``.
```
` tag with the the SVG as its source file and add it as a child of ``.
```
 ```
If you've had difficulty following along, don't worry! Full code samples and documentation for everything in this tutorial can be found in our GitHub repository [react\_google\_maps\_demo](https://github.com/afilabs/react%5Fgoogle%5Fmaps%5Fdemo?ref=blog.afi.io).
### What you've learned
In this tutorial, I've shown you how to customize map markers using the Google Maps React component library and use them to make your maps useful, interactive and fun! In the next one, I'll show you how to add shapes to a Google Map that you can use to highlight areas of interest or show routes and paths returned by other Google Maps APIs such as the [Routes API](https://developers.google.com/maps/documentation/routes?ref=blog.afi.io) or [GMPRO](https://developers.google.com/maps/documentation/route-optimization?ref=blog.afi.io).
**This article was written by** [**Afi Labs**](https://afi.io/?ref=blog.afi.io)**, a** [**Google Maps Premier Partner**](https://www.afi.io/?ref=blog.afi.io) **and reseller. We build route optimization, navigation, and fleet tracking software on Google Maps, and offer volume pricing on GMP licensing.** [**Talk to an engineer**](https://www.afi.io/contact%5Fus?ref=blog.afi.io) **or** [**follow Afian on LinkedIn**](https://www.linkedin.com/in/afian-anwar/?ref=blog.afi.io)**.**
Next: [Part 4: Draw a Google Maps polyline in React](https://blog.afi.io/blog/draw-a-google-maps-polyline-in-react/)
```
If you've had difficulty following along, don't worry! Full code samples and documentation for everything in this tutorial can be found in our GitHub repository [react\_google\_maps\_demo](https://github.com/afilabs/react%5Fgoogle%5Fmaps%5Fdemo?ref=blog.afi.io).
### What you've learned
In this tutorial, I've shown you how to customize map markers using the Google Maps React component library and use them to make your maps useful, interactive and fun! In the next one, I'll show you how to add shapes to a Google Map that you can use to highlight areas of interest or show routes and paths returned by other Google Maps APIs such as the [Routes API](https://developers.google.com/maps/documentation/routes?ref=blog.afi.io) or [GMPRO](https://developers.google.com/maps/documentation/route-optimization?ref=blog.afi.io).
**This article was written by** [**Afi Labs**](https://afi.io/?ref=blog.afi.io)**, a** [**Google Maps Premier Partner**](https://www.afi.io/?ref=blog.afi.io) **and reseller. We build route optimization, navigation, and fleet tracking software on Google Maps, and offer volume pricing on GMP licensing.** [**Talk to an engineer**](https://www.afi.io/contact%5Fus?ref=blog.afi.io) **or** [**follow Afian on LinkedIn**](https://www.linkedin.com/in/afian-anwar/?ref=blog.afi.io)**.**
Next: [Part 4: Draw a Google Maps polyline in React](https://blog.afi.io/blog/draw-a-google-maps-polyline-in-react/)