How to pan, zoom, and adjust tilt on Google Maps 3D
Become an expert at panning, zooming, and adjusting viewing angles on Google Maps with the Photorealistic 3D Tiles API.

In Part 2 of our Google Photorealistic 3D Tiles API tutorial series, I’ll show you how to pan, zoom, and adjust viewing angles in Google Maps 3D. I’ll explain what flyCameraTo does and how you can use it to build a simple app that explores tourist destinations around Vancouver by smoothly zooming from one location to another. As always, you’ll find full working code at the end of the tutorial.
Part 1: What is the Google Photorealistic 3D Tiles API?
Part 2: How to pan, zoom, and adjust tilt on Google Maps 3D (this article)
Part 3: Use Place Autocomplete to go anywhere on Google Maps 3D
Part 4: Add map markers, overlays and polylines to Google Maps 3D
Part 5: Add a 3D polygon to a Google Photorealistic 3D map
Part 6: Senakw Vancouver on a Photorealistic 3D Map. Will it block your view?
Controlling the camera and perspective with Google Maps 3D
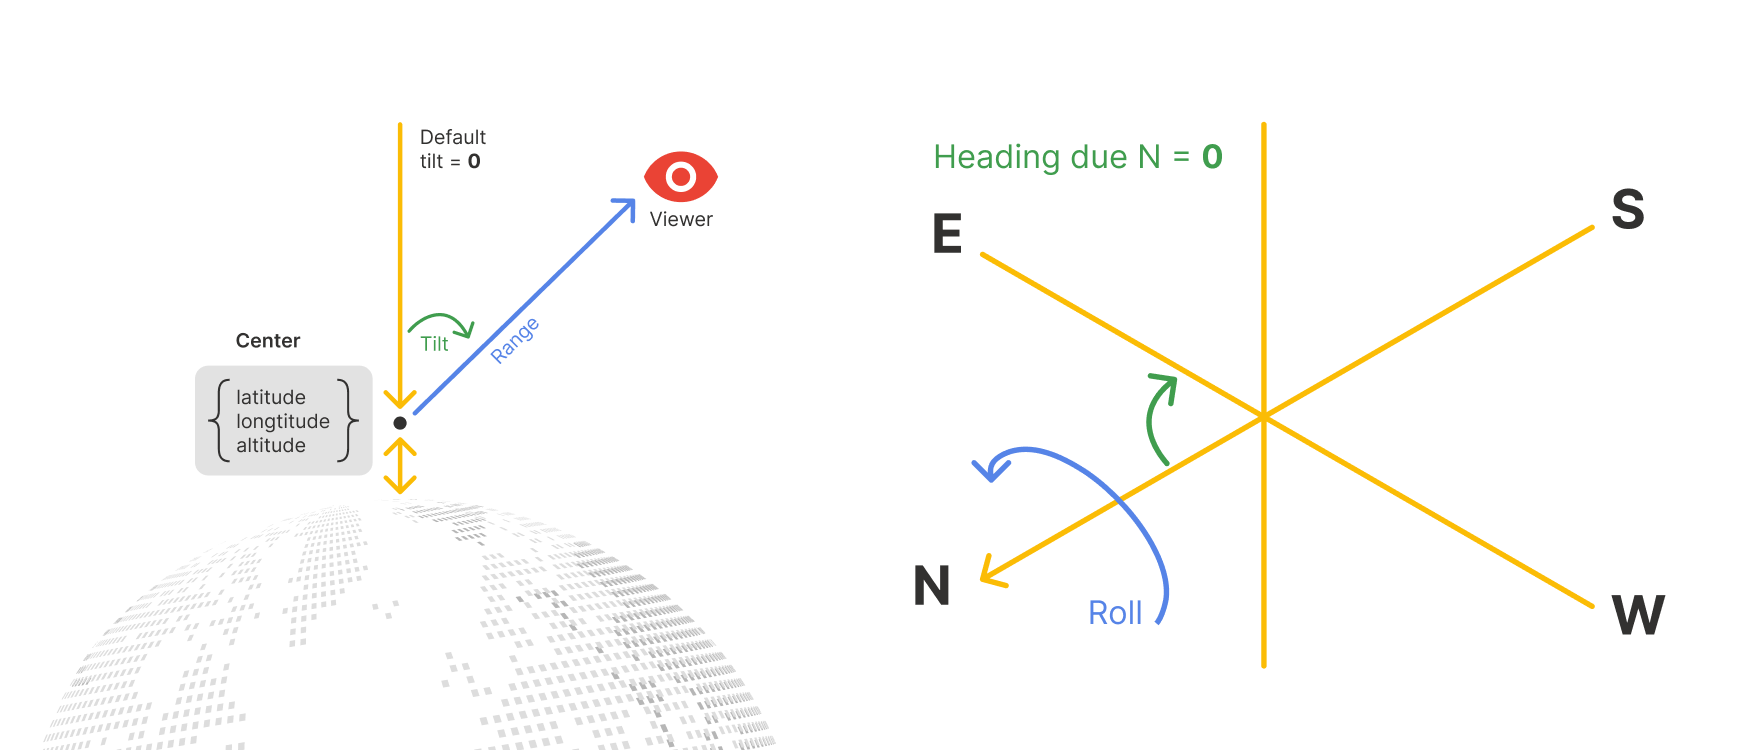
To understand how Google Photorealistic 3D Tiles works, we first need to understand the concept of a scene. In the context of 3D mapping software, a scene refers to the entire 3D environment that's currently being rendered or displayed. It includes the camera and its perspective, which consists of a:
center: The camera's target location in latitude, longitude, and altitude.range: How far the camera is from the target point, in meters.tilt: The vertical angle of the camera (0° = top-down, 90° = fully horizontal).heading: The compass direction the camera faces (in degrees, 0° = north).
To set up the initial scene (which loads when the user refreshes the webpage), we need to initialize a Map3DElement and pass in the center, range, tilt and heading as parameters like so:
const {
Map3DElement,
MapMode,
Marker3DInteractiveElement
} = await google.maps.importLibrary("maps3d");
const map3DElement = new Map3DElement({
center: {
lat: 49.2929995,
lng: -123.1208629,
altitude: -25
},
range: 2000,
tilt: 80,
heading: 315,
mode: MapMode.SATELLITE,
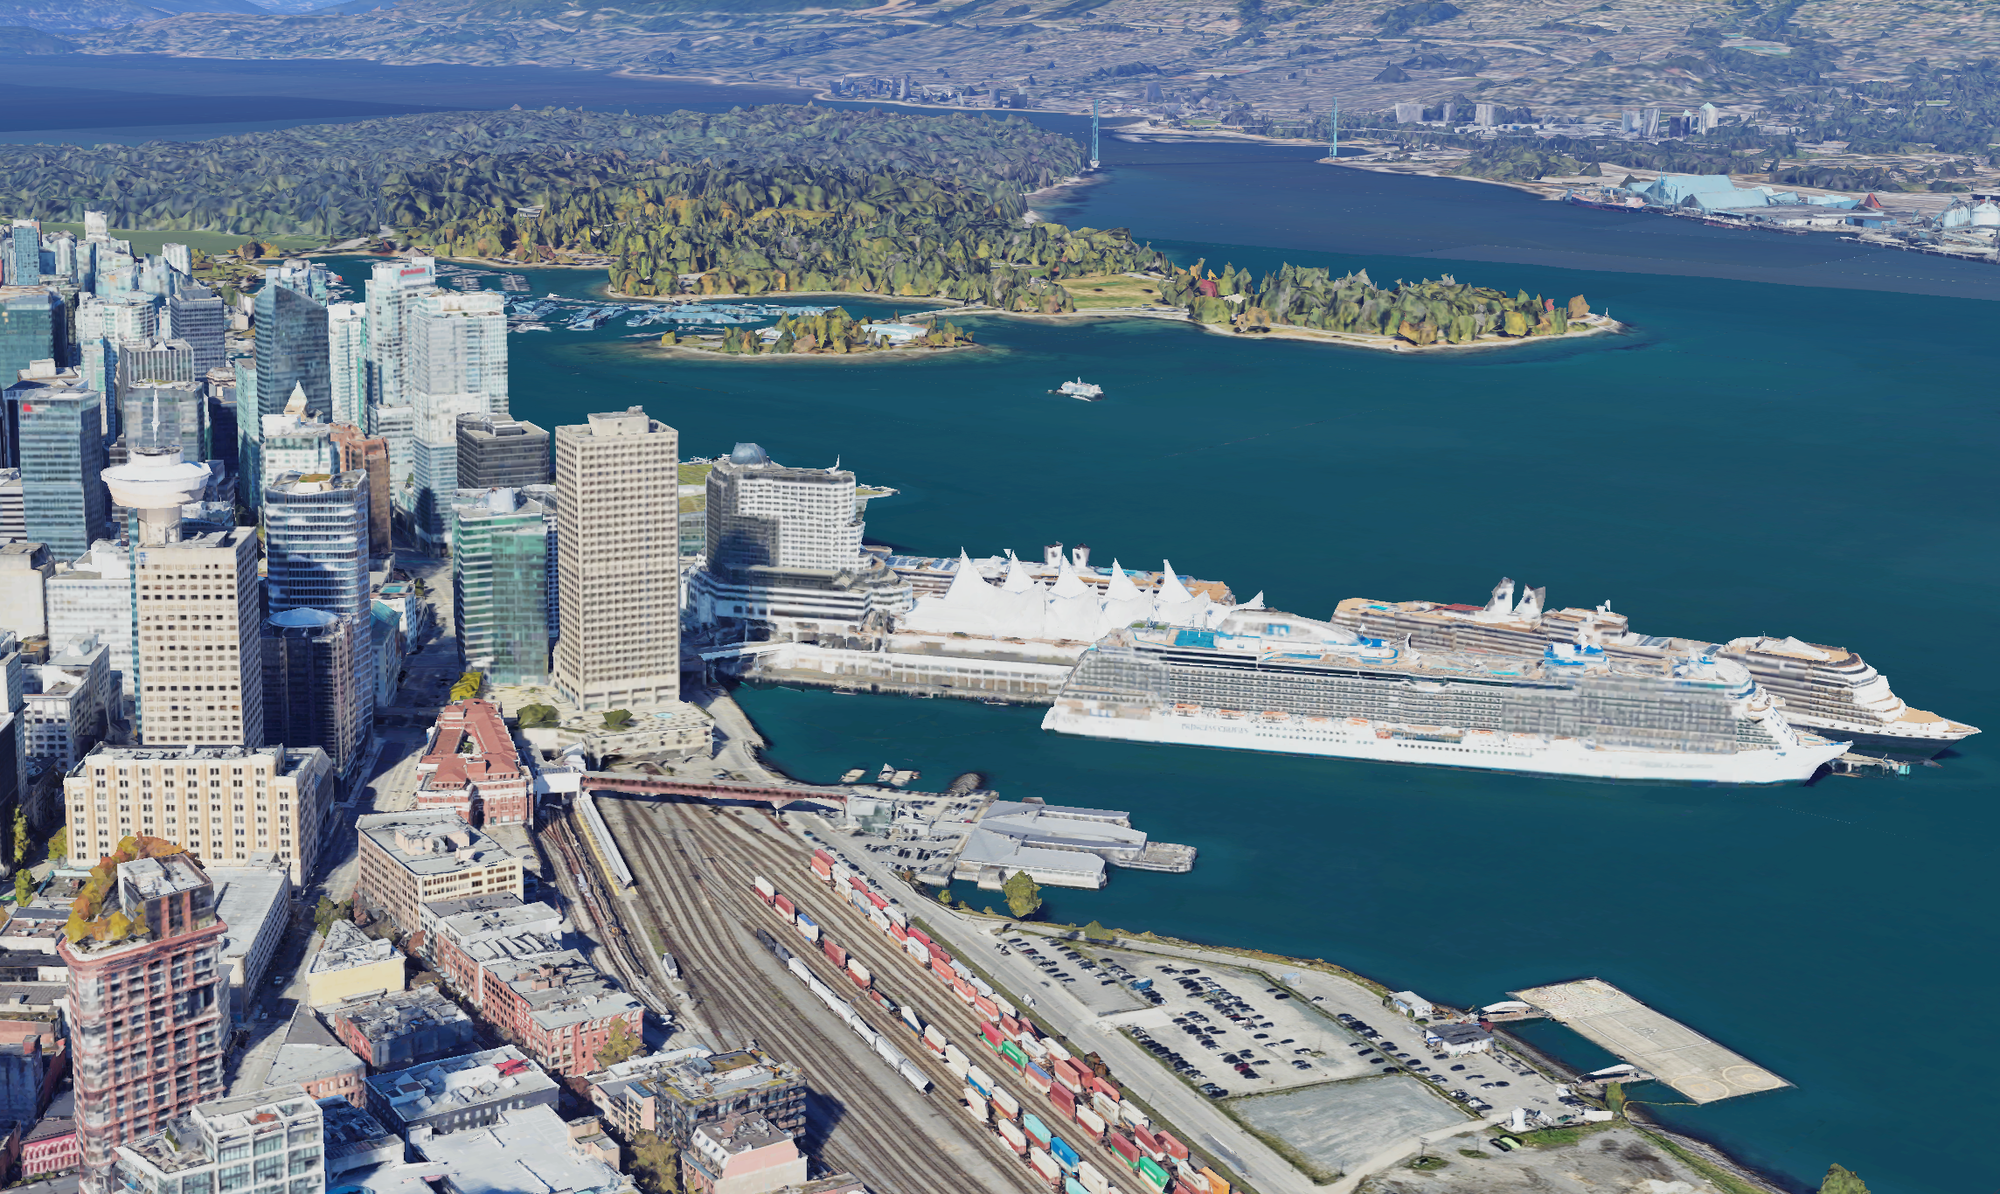
});The code above sets up a scene looking at the Canada Place cruise ship terminal in Vancouver, Canada.
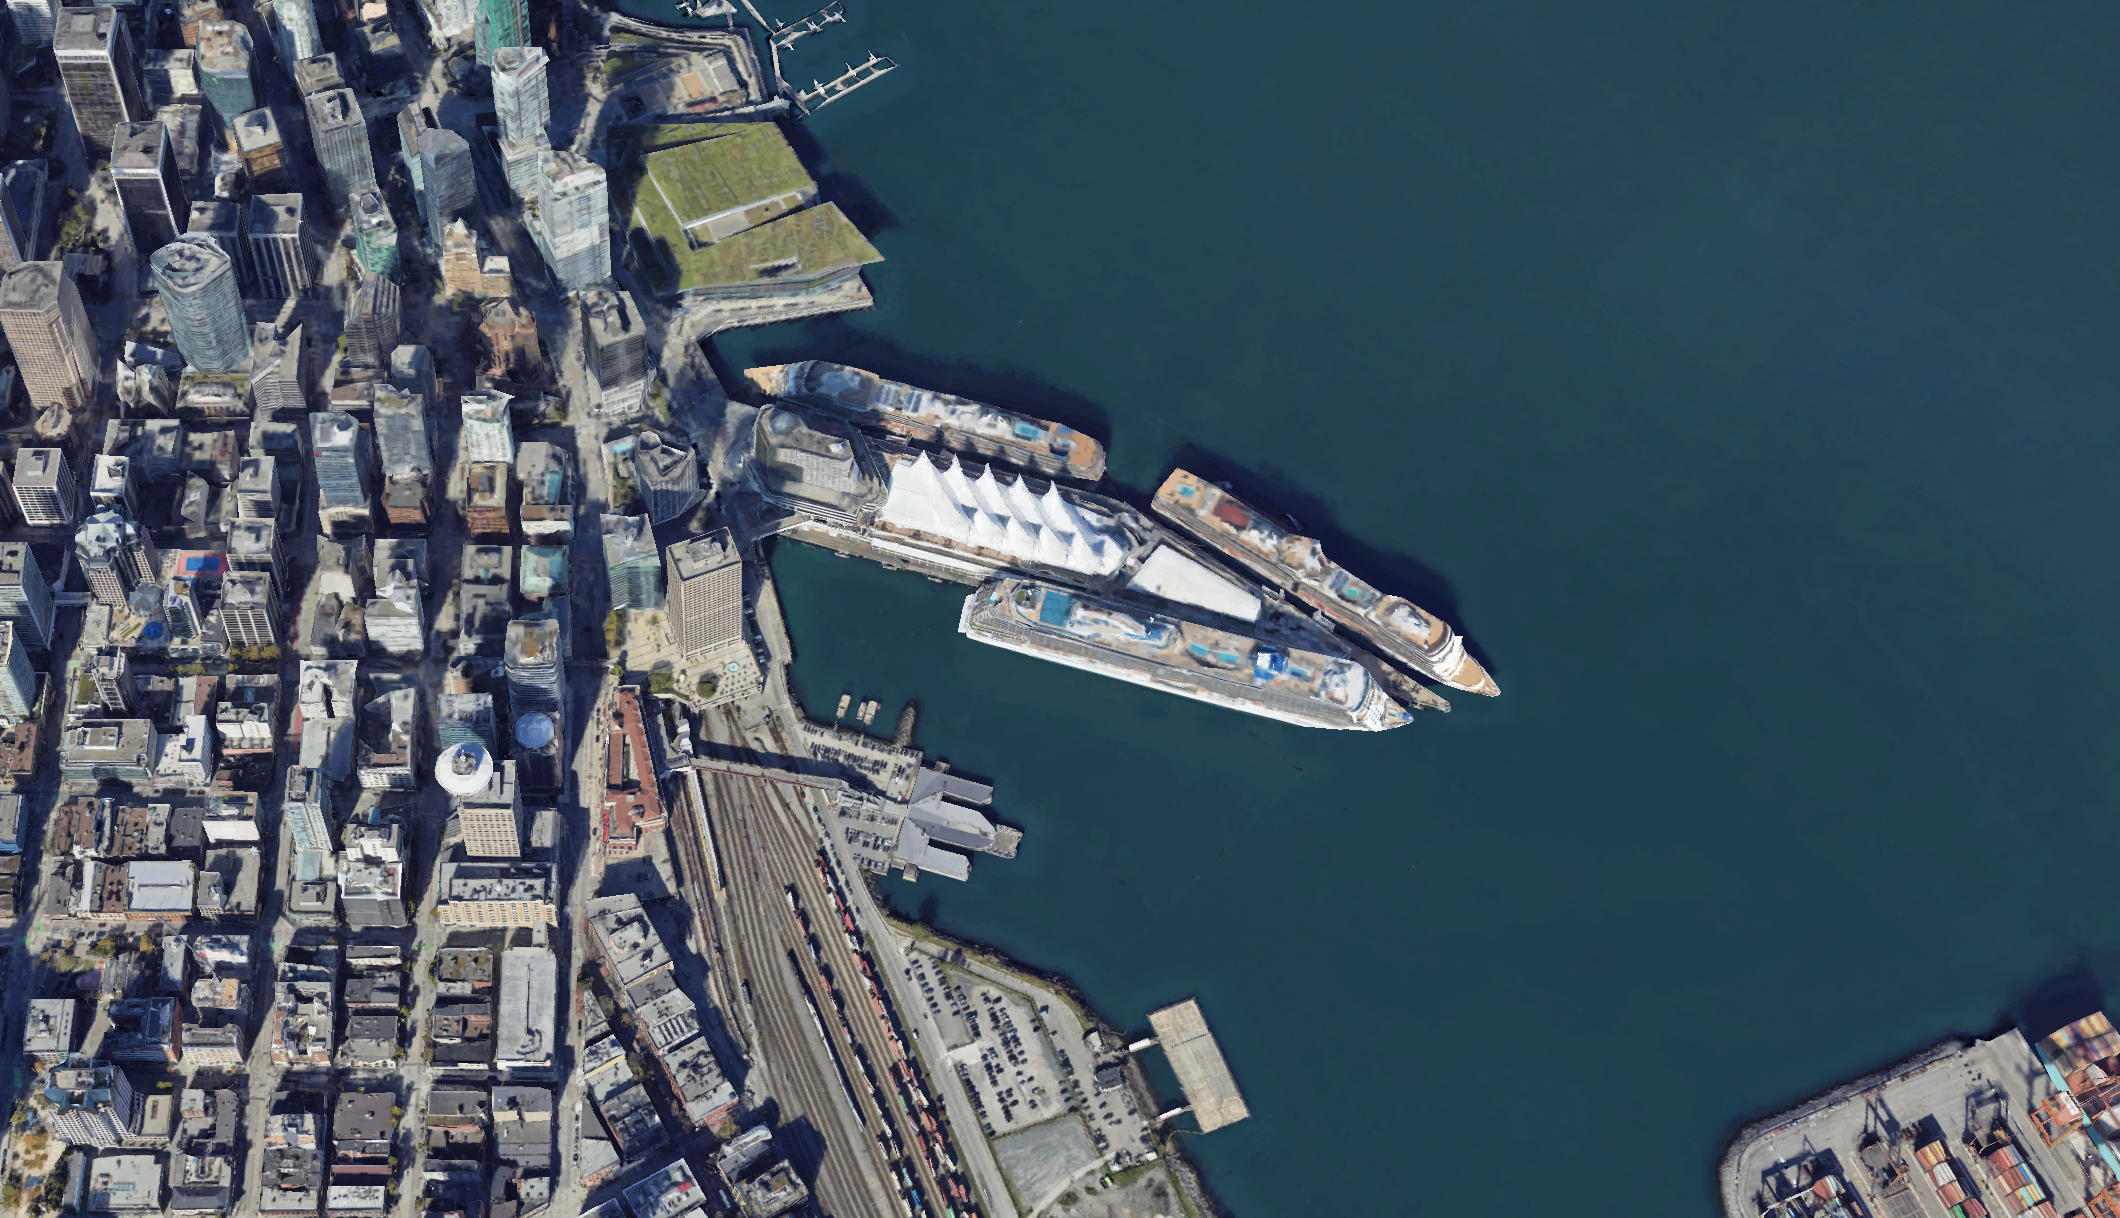
If we change the tilt to 15°, we’ll still be viewing Canada Place—just from a higher angle in the sky.
Panning and zooming with the Google Maps 3D
One of the cool things you can do with the Photorealistic 3D Tiles API is smooth pan the camera from one location to another using the flyCameraTo function.
Here's how it works:
map3DElement.flyCameraTo({
	endCamera: {
		center: {
			lat: 49.2912436,
			lng: -123.1461287,
			altitude: -25
		},
		range: 1000,
		tilt: 80,
		heading: 125
	},
	durationMillis: 2000
});
To move the camera, call the flyCameraTo() method on the map3DElement object and pass in an endCamera object as the argument. The endCamera object defines the target scene, including the final camera position and durationMillis, the time, in milliseconds, it should take to transition from the current view to the target.
Creating a tourist explorer app for Vancouver with Google Maps 3D
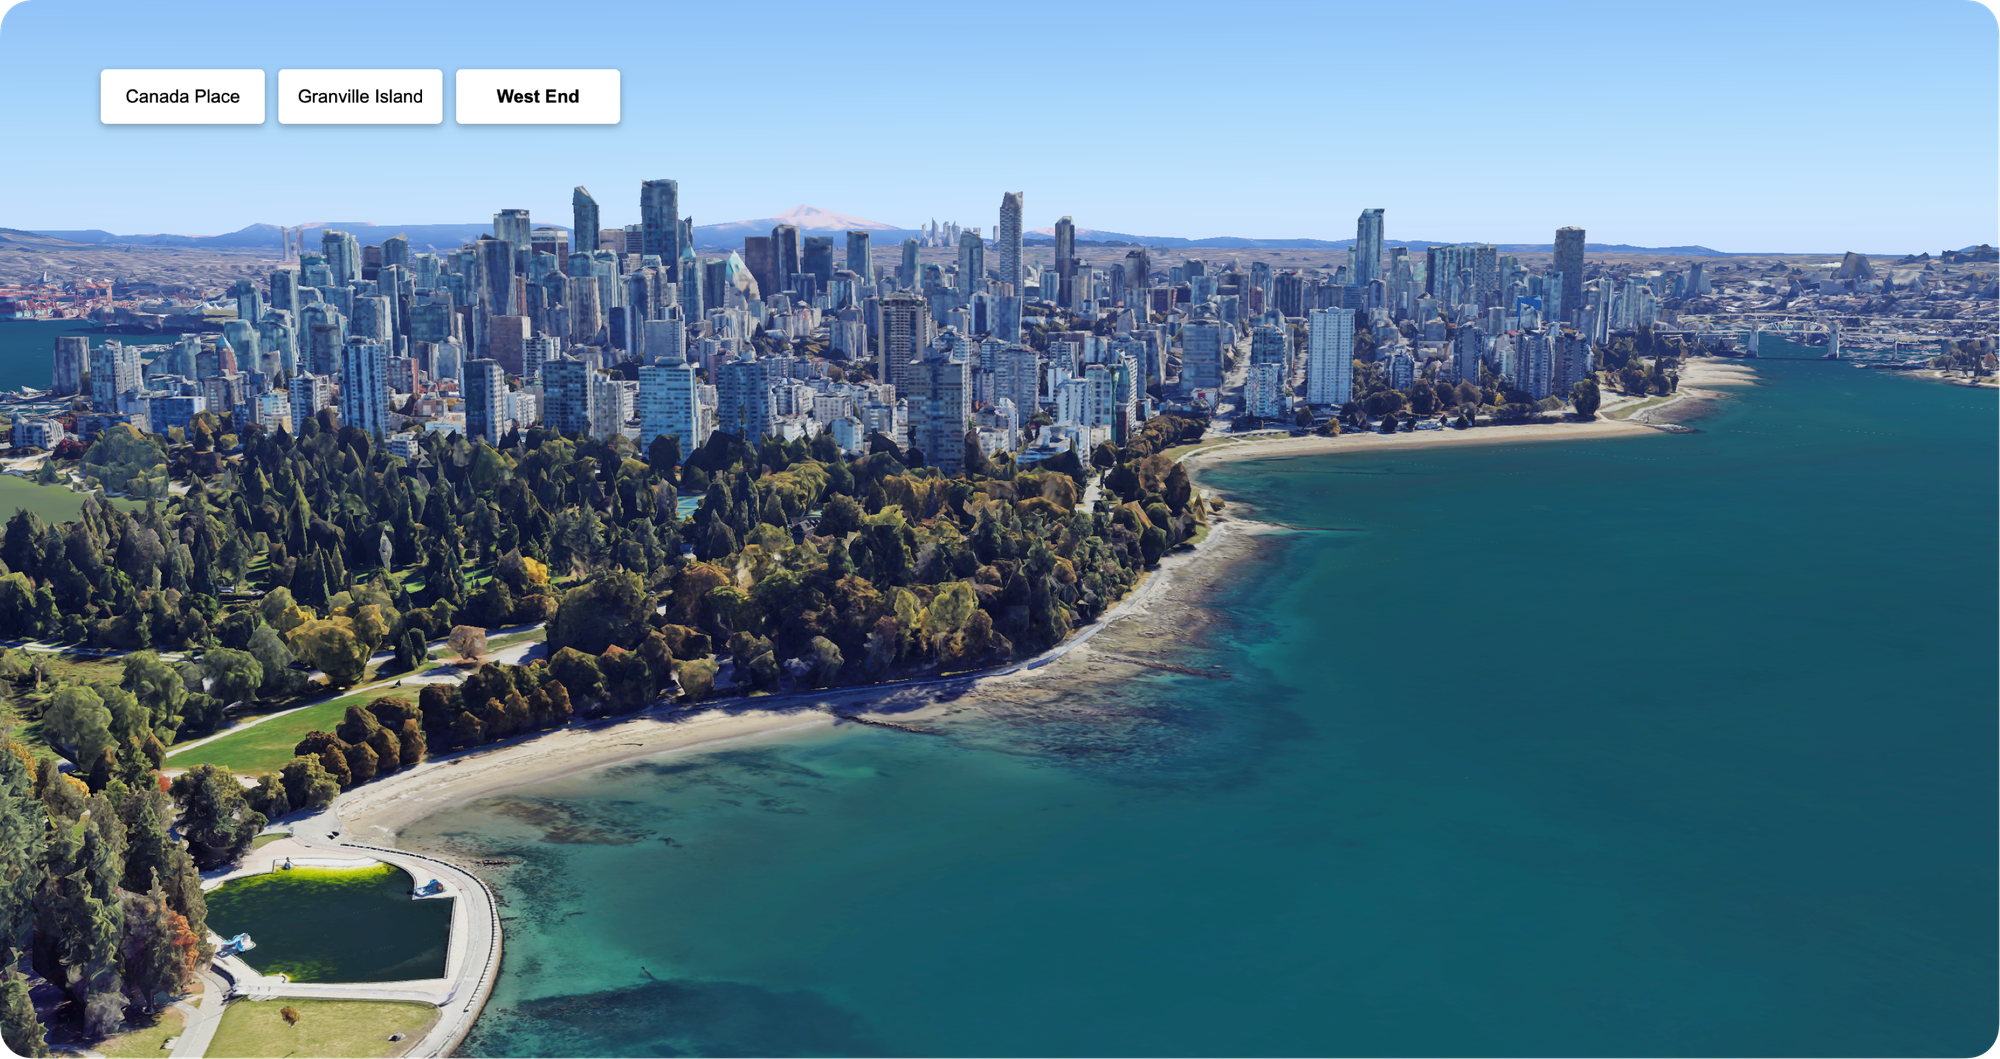
In this last section, we'll apply what we've learned in this blog post by building a tourist explorer app that lets user explore preset tourist destinations in Vancouver using the Google Photorealistic 3D Tiles API.
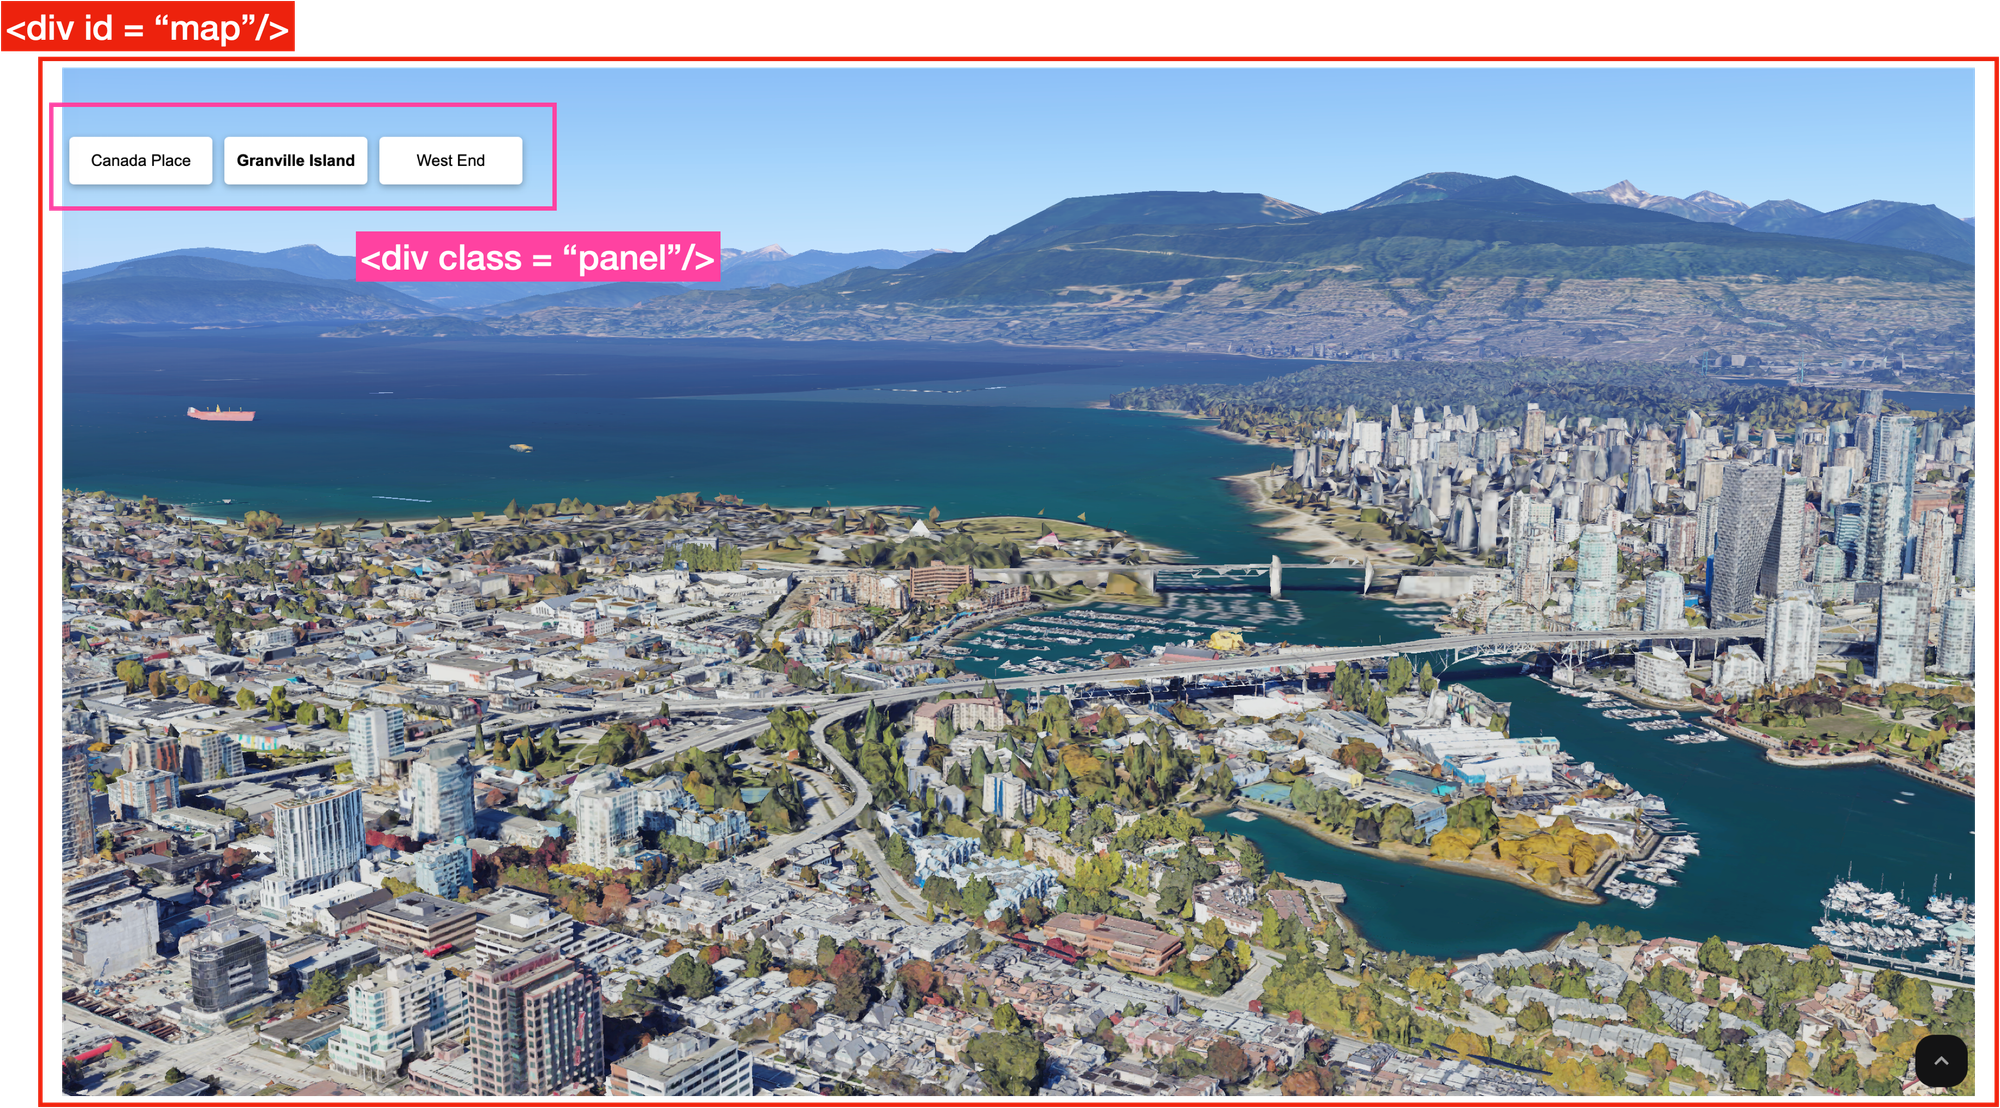
The google_maps_3d_pan_zoom.html file uses standard HTML, Javascript, and CSS. Inside, there are two key div elements: the map div displays the Map3DElement, while the panel div contains buttons representing three popular Vancouver tourist destinations - Canada Place, Granville Island and the trendy West End neighborhood.
When users click a button, they will be "flown" to their selected destination. Here are the main pieces of code to take note of (full source code is provided at the end):
Initializing destination buttons
initLocationButton('Canada Place', 49.2929995, -123.1208629, 2000, 80, 315);
initLocationButton('Granville Island', 49.2756369, -123.1419591, 2000, 80, 330);
initLocationButton('West End', 49.2912436, -123.1461287, 1000, 80, 125);
The first thing we do is to initialize each buttons with it's display text, location (lat and lng) as well as range, tilt and heading of the camera view. The button is then given a location-button class and added to the div with class location-buttons. location-buttons is a child component of the panel div.
const locationButtonsContainer = document.querySelector('.location-buttons');

const initLocationButton = (text, lat, lng, range, tilt, heading) => {
	const button = document.createElement('button');
	button.textContent = text;
	button.classList.add('location-button');

	// Rest of initLocationButton

    locationButtonsContainer.append(button);
}
Adding event listeners
Next, we add event listeners to detect button 'click' events so that we can call the panToLocation method to start the pan and zoom animation. We also set the button to class active and update the URL path with the location pathname.
// Inside initLocationButton
button.addEventListener('click', () => {
	panToLocation(text, lat, lng, range, tilt, heading);
	// Remove active class from other buttons
	document.querySelectorAll('.location-button').forEach(btn => {
		btn.classList.remove('active');
	});
	// Add active class to this button
	button.classList.add('active');
	// Update URL with active location
	urlParams.set('location', text);
	const newUrl = `${window.location.pathname}?${urlParams.toString()}`;
	window.history.pushState({}, '', newUrl);
});
Pan and zoom
Finally, we use the flyCameraTo() method to fly us to the location of the button we just clicked. The range, tilt and heading are passed to panToLocation from the initDestinationButtons() method parameters.
async function panToLocation(label, lat, lng, range, tilt, heading) {
	// Fly to location
	map3DElement.flyCameraTo({
		endCamera: {
			center: {
				lat: lat,
				lng: lng,
				altitude: -25
			},
			range: range,
			tilt: tilt,
			heading: heading
		},
		durationMillis: 2000
	});
}
The full source code for the above example can be found below. To run the code, download google_maps_3d_pan_zoom.html to your local machine, replace {YOUR_API_KEY} with your Map Tiles enabled Google Maps API key and open the file in your favorite browser.
In the next blog post, I will show you how to connect a Google Place Autocomplete text box to Photorealistic 3D Map Tiles. This will give you the ability to search for and explore any location in the world, in 3D!
👋 As always, if you have any questions or suggestions for me, please reach out or say hello on LinkedIn.
Next: Part 3: Use Place Autocomplete to zoom to a specific location on Google Maps 3D