Use Place Autocomplete to go anywhere on Google Maps 3D
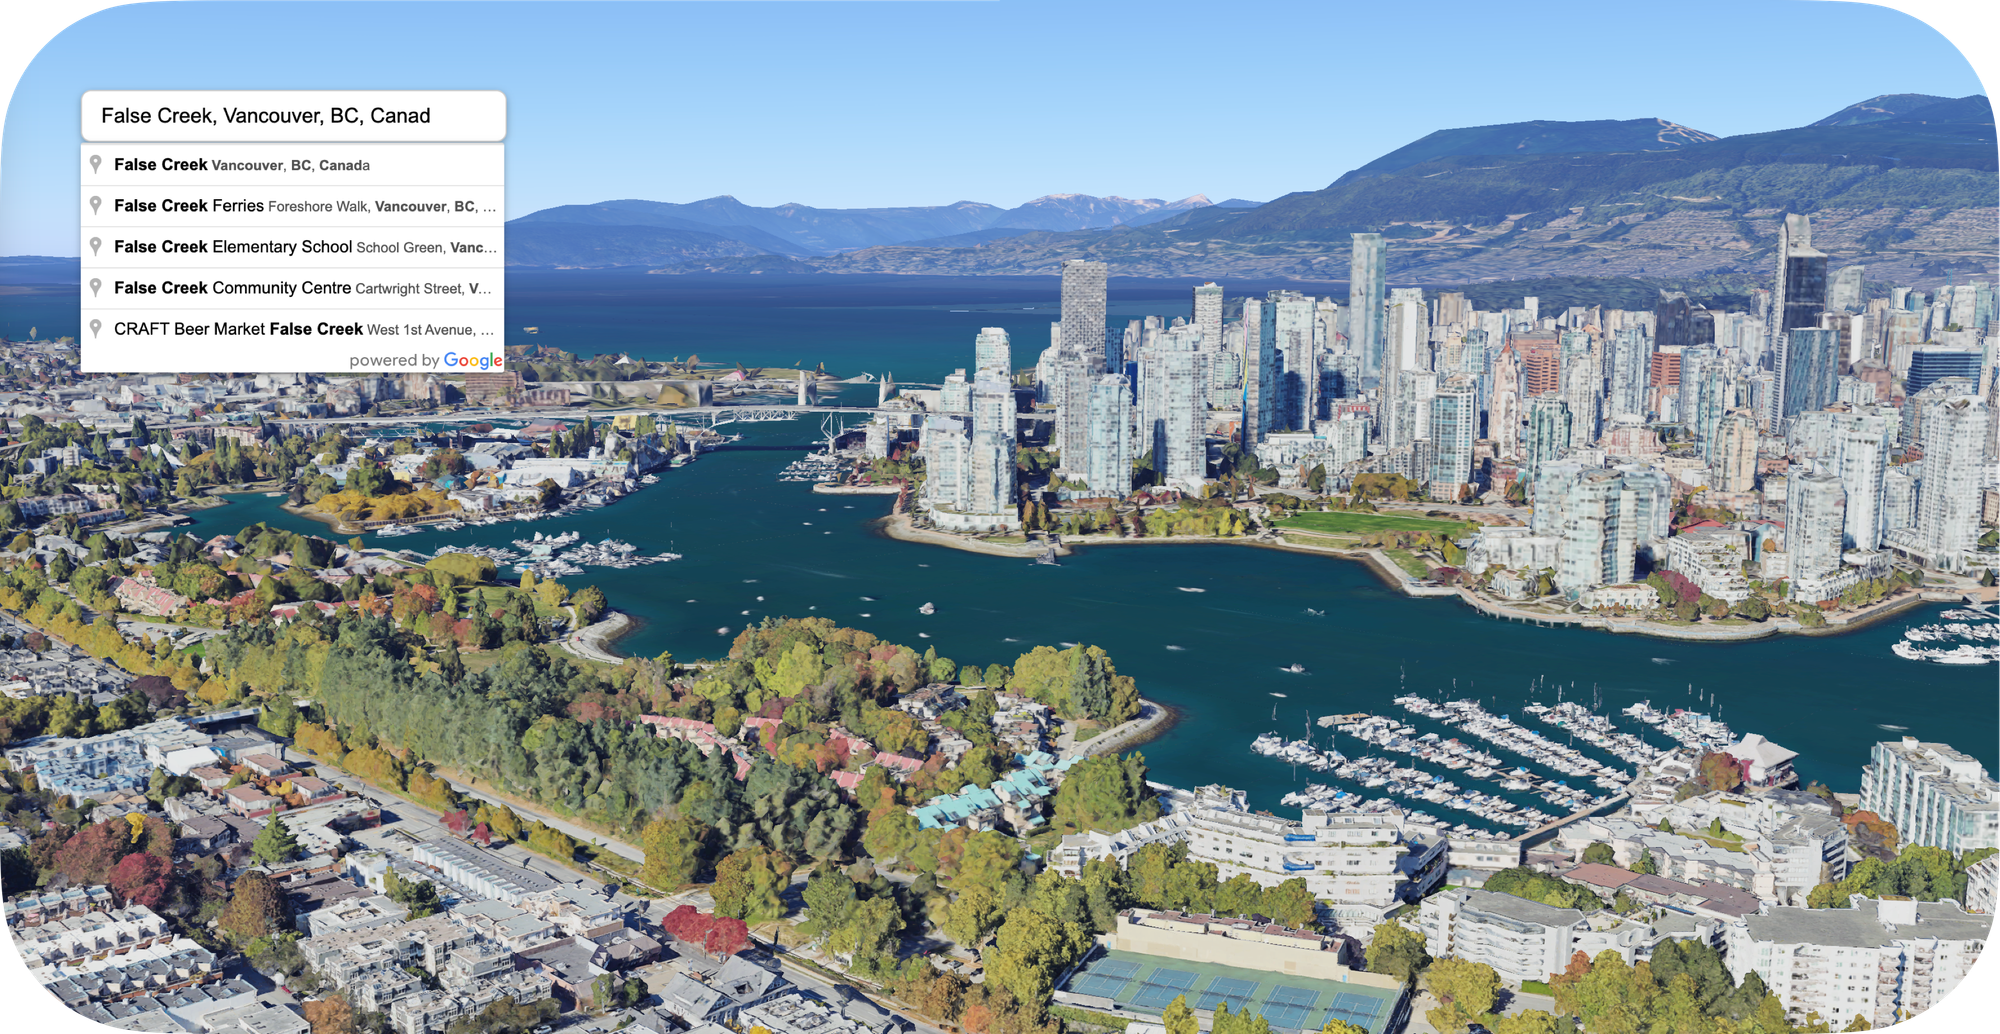
Using a Google Place Autocomplete search box to zoom to a specific location with the Photorealistic 3D Tiles API.

In this quick tutorial, you’ll learn how to use a Google Place Autocomplete search box to find a location and smoothly zoom (or fly ✈️) to it with the Photorealistic 3D Tiles API - all with just a few lines of code.
Part 1: What is the Google Photorealistic 3D Tiles API?
Part 2: How to pan, zoom, and adjust tilt on Google Maps 3D
Part 3: Use Place Autocomplete to go anywhere on Google Maps 3D (this article)
Part 4: Add map markers, overlays and polylines to Google Maps 3D
Part 5: Add a 3D polygon to a Google Photorealistic 3D map
Part 6: Senakw Vancouver on a Photorealistic 3D Map. Will it block your view?
In the last tutorial, I showed you how to jump to different preset locations on a Google Photorealistic 3D Tiles map. In this one, you'll learn how to fly to any location in the world using a Google Place Autocomplete search box.
What is Google Place Autocomplete?
Google Place Autocomplete is an API that offers location-based suggestions as users type into a search input field. As the user types, an autocomplete widget displays a dropdown menu with predicted place options.
When a user selects an option, the coordinates for the selected place are returned and can be used elsewhere in the app.
How do you integrate Google Place Autocomplete with the Photorealistic 3D Tiles API?
Adding Google Place Autocomplete to Photorealistic 3D map tiles is no different from adding it to a 2D map.
Import the Google Maps Javascript Library
First, import the Places API from the Google Maps Javascript Library. Add this <script/> tag to the <body/> of your web page.
<script async defer src="https://maps.googleapis.com/maps/api/js?key={YOUR_API_KEY}&libraries=places&v=alpha&callback=initMap"></script>Create an Autocomplete widget
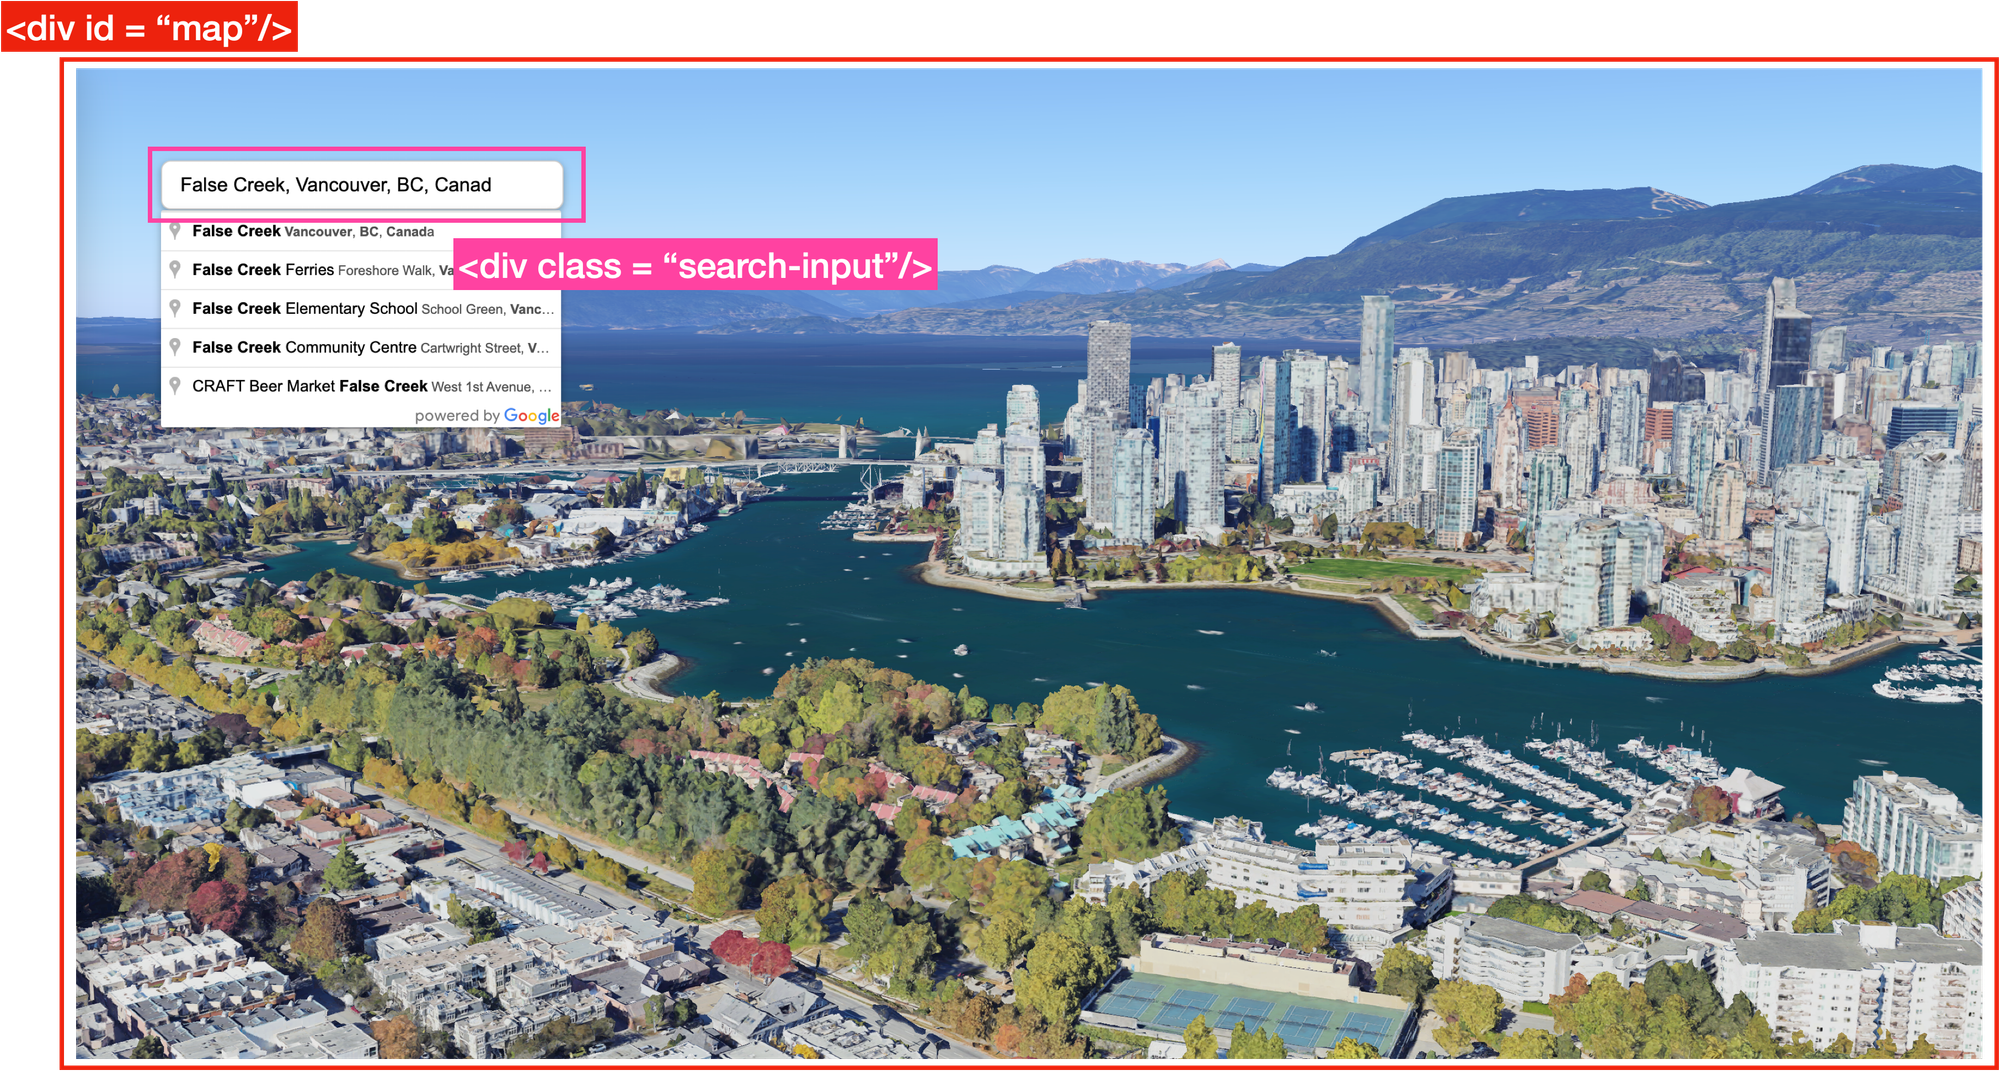
Next, select the HTML element with the class "search-input" and initialize the Google Places Autocomplete widget on that input field. It turns the input into a search box that suggests locations (places, addresses, etc) as the user types.
const input = document.querySelector('.search-input');
const autocomplete = new google.maps.places.Autocomplete(input);
Add an event listener to the autocomplete widget
After this, add a place_changed listener to detect when a new place has been selected from the autocomplete widget, and instruct the map to zoom to the new location by calling the flyToLocation() method.
autocomplete.addListener('place_changed', () => {
   const place = autocomplete.getPlace();
   if (!place.geometry) return;
   flyToLocation(
      place.formatted_address,
      place.geometry.location.lat(),
      place.geometry.location.lng()
   );
});
Use flyCameraTo to zoom to the selected location
Inside flyToLocation, use the flyCameraTo() method to zoom to the selected location. (For a detailed breakdown of how this method works, see my previous post.) The endCamera object defines the destination scene, while durationMillis controls how long the camera takes to "fly" from the current view to the target location.
async function flyToLocation(label, lat, lng) {
   // Fly to location
   map3DElement.flyCameraTo({
      endCamera: {
         center: {
            lat: lat,
            lng: lng,
            altitude: 10
         },
         range: 1000,
         tilt: 80,
         heading: 315
      },
      durationMillis: 5000
   });
}
And that's it! Full working code for the above example can be found in the google_maps_3d_autocomplete.html file below.
What's next?
So far, you've learned how to set up a basic 3D map using Google Photorealistic 3D Tiles, use the flyCameraTo method to smoothly navigate between locations, and integrate a Google Place Autocomplete search box to explore any place on Earth in 3D. In the next post, we’ll take it a step further by showing you how to highlight points of interest using markers, overlays, and polylines.
👋 As always, if you have any questions or suggestions for me, please reach out or say hello on LinkedIn.
Next: Part 4: Adding map markers, overlays and polylines to a Google Maps 3D app